
Bathroom Exhaust Fan Not Working in a New Apartment?
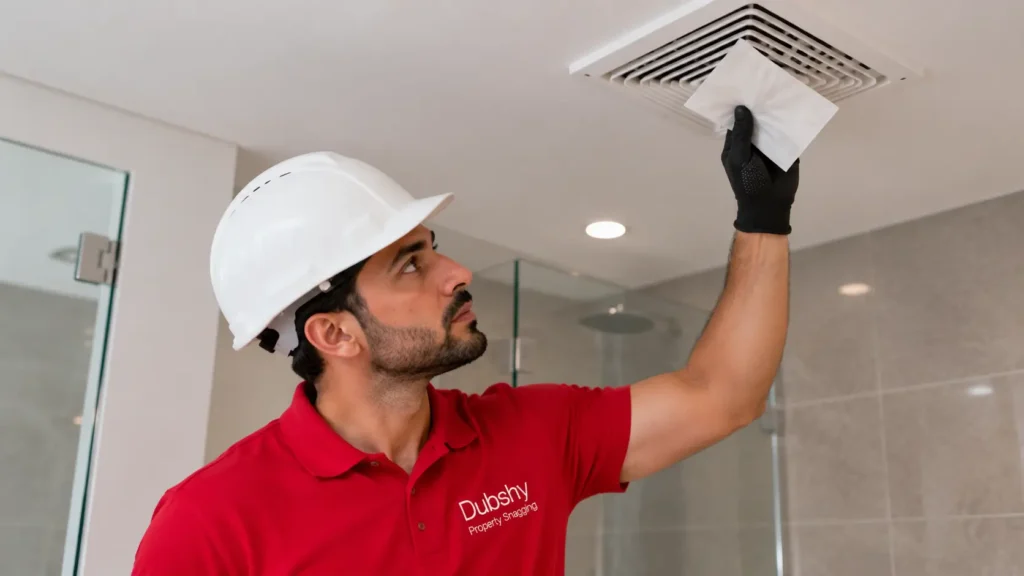
Image: FeaturedRatio: 16:9 (1200 x 675)Situation: Hand holding a tissue under a ceiling exhaust fan grille in a modern apartment bathroom; the tissue is pulled flat against the grilleTitle: Bathroom Exhaust Fan Tissue TestAlt text: Tissue test at a bathroom exhaust fan grille in a new apartment Bathroom Exhaust Fan Not Working in a New Apartment? Updated 13 October 2026How-to guide5 min read If your bathroom exhaust fan is not working in a new apartment, run three safe checks: the switch, a tissue test at the grille, and a listen for the motor. If the fan is silent, only hums, or barely moves air, do not open it. Record what you found and report it as a snag. In this guide What “not working” looks like Quick tests you can do safely Possible causes Fix it yourself or report it? Check the kitchen hood too Why it matters FAQs A new apartment should hand over with every fan working. This guide from Dubshy Property Snagging helps you tell a setting problem from a real defect, without picking up a screwdriver. What Does “Not Working” Look Like? A fan can fail in several ways, and each points to a different check. What you notice What it can mean Silent, nothing happens No power reaching the fan, or a switch problem Hums but no airflow Power is there, but the motor or the air path is stuck Runs but pulls weakly Something is restricting the air path Loud rattle or grinding Something loose or rubbing inside Mirror stays fogged long after a shower The fan is not clearing steam Image: Internal 1 (after the symptoms table)Ratio: 16:9 (1200 x 675)Situation: Bathroom mirror still fogged with steam a few minutes after a hot shower, fan grille visible in the ceilingTitle: Steamed Bathroom Mirror Poor VentilationAlt text: Steamed-up bathroom mirror showing poor ventilation A mirror that stays fogged is often the first sign the fan is not doing its job. Bathroom Exhaust Fan Not Working in a New Apartment: Quick Tests These checks need no tools, no ladder and no opening of covers. Find the right switchCheck whether the fan runs with the bathroom light or has its own switch, and try both. Do the tissue testHold a single tissue just below the grille with the fan on. A working fan pulls it flat against the grille. ListenNote whether you hear nothing, a hum, normal running or a rattle. Test after a showerRun the fan after a hot shower and see whether the mirror clears. Check the breaker onceIf the bathroom circuit has tripped, reset it once. If it trips again, stop and report it. What Are the Possible Causes? Only an engineer or electrician can confirm the cause, but these are the usual possibilities: Power or switch fault. The fan is not getting power, or the switch is wired or working incorrectly. Motor not spinning freely. Dirt or debris in the air passage can stop or slow it. Duct problem. The duct behind the fan can be blocked, crushed or not connected at all. Should You Fix It Yourself or Report It? In a new apartment, report it. A fault in a new fitting is something for the developer to fix, and opening the fan means working near live wiring. You can do Leave for the developer or an electrician Try both switches Removing the cover or grille Tissue test and listening Checking wiring or the switch Reset a tripped breaker once A breaker that trips again Record a short video and photo Checking or reconnecting the duct Report it in writing with the video, the room and the date. If you are still before handover, add it to your snag list; our guide to apartment snagging shows how the full inspection runs. Fans are tested alongside taps, drains and sealant in our bathroom and kitchen checks. Check the Kitchen Hood at the Same Time A kitchen hood extraction check at handover uses the same tissue test. Switch the hood on at each speed and hold a tissue under the filter; it should lift towards the hood. Testing every fan in one visit is part of a fans and ventilation check. Image: Internal 2 (in the kitchen hood section)Ratio: 16:9 (1200 x 675)Situation: Tissue held under a kitchen cooker hood with the hood switched on, tissue lifting towards the filterTitle: Kitchen Hood Extraction CheckAlt text: Tissue test under a kitchen cooker hood at handover The same tissue test works on a kitchen hood: the tissue should lift towards the filter. Why Does a Working Fan Matter? The fan is there to clear steam. If it does not, the bathroom stays damp for longer after every shower. Keep an eye on ceiling corners, grout and sealant, and if dark spots appear, read our guide to mould and mildew inspection. For official building rules, see Dubai Municipality. FAQs Why does my bathroom fan hum but not pull air? A hum usually means the fan is getting power but air is not moving. The motor may not be spinning freely, or the duct behind it may be blocked, crushed or not connected. In a new apartment, do not open it yourself. Record the hum, do the tissue test and report it. Is a weak bathroom fan a snag the developer should fix? Report it as one. A fan that runs but barely holds a tissue may not be clearing steam, and that is worth recording before handover or as soon as you notice it. Whether the developer repairs it depends on your sale agreement and timing, so put it in writing with a video. Can I replace the fan myself in a new apartment? It is better not to. Opening the fan means working near electrical wiring, which should only be done by a qualified electrician with the power off. In a new apartment, a fault is something to report to the developer first, and a self-repair could make it harder to get it fixed.
Villa Private Lift Inspection in Dubai: Rules and Checks

Villa Private Lift Inspection in Dubai: What to Check Updated 12 October 2026Checklist5 min read A villa private lift inspection in Dubai checks that your home lift rides smoothly, stops level at each floor, and that its doors, alarm, lighting and power supply work as they should. At handover you can run a simple ride test yourself. Testing the lift’s machinery is a job for a licensed lift company. Quick answer: ride to every floor, check the cabin stops level, test the doors and alarm, ask for the lift’s papers, and report anything unusual before you accept the villa. In this guide What the inspection checks Handover test for a home lift Who checks what Papers to ask for Warning signs after you move in FAQs A private lift is one of the few parts of a villa that moves people between floors, so it deserves its own check at handover, alongside the rest of our villa snagging checklist. This guide from Dubshy’s engineering team shows what to look at and who should test what. What Does a Villa Private Lift Inspection in Dubai Check? It looks at the parts of the lift you use and the building work around it. These are the areas to cover: Home lift check6 areas Cabin Finishes, handrail, floor, lighting, ventilation Doors Open and close smoothly at every floor Controls Floor buttons, door buttons, alarm button Ride Smooth start and stop, level with each floor Surroundings Landing finishes, walls and floor around each door Power Supply to the lift and its labelling on the board Test every button on the panel, including the alarm, during the handover visit. How Do You Test a Home Lift at Handover? Run this short test without opening any panel or entering the shaft. Report anything that feels wrong. Ride to every floorGo up and down at least once between all levels. The start and stop should be smooth, without jerks or knocks. Check each stopWhen the doors open, the cabin floor should sit level with the landing. A step up or down is a trip hazard. Test the doorsWatch them open and close at each floor. Note any scraping, sticking or doors that do not close fully. Press the alarm buttonAsk the developer’s team what should happen and who receives the call, then check that it works. Look at the cabinLights work, the fan runs, finishes are undamaged and the handrail is firm. Check the landingsWalls, floors and frames around each lift door are complete and undamaged. Who Checks What: Snagging Engineer or Lift Company? A snagging engineer and a lift company look at different things. Knowing the split helps you book the right person. Item Snagging engineer Licensed lift company Ride and level stops Records what is felt and seen Adjusts and tests the machinery Doors Records faults and finish damage Tests and adjusts door safety Cabin and landings Finishes, lighting, building work Not usually covered Power supply Supply and board labelling Lift controller and wiring inside the lift Machinery, brakes, ropes Not covered Tests and services The lift’s power supply connects to the villa’s wiring, so it fits naturally into an electrical systems inspection. Ask us to confirm what is included for your lift when you book. Landing doors and the finishes around them are part of the building work to check at handover. What Papers Should You Ask For? Ask the developer or lift installer for these before you accept the villa. Which ones apply depends on your lift and your agreement, so treat this as a list of questions. Ask for Why it helps Installer’s handover or test record Shows the lift was checked before it was handed to you Warranty details Tells you what is covered and for how long Maintenance contact Who to call for servicing and breakdowns User guide and emergency steps What everyone at home should do if the lift stops What Are the Warning Signs After You Move In? Stop using the lift and call the lift company if you notice any of these: New noises. Grinding, knocking or squealing during the ride. Uneven stops. The cabin stops above or below the floor level. Door problems. Doors that will not close, reopen on their own or move unevenly. Burning smell or flicker. Treat this as a safety issue and switch off the lift supply if it is safe to do so. For the wider picture of keeping your home safe, see our fire safety checks at home. For official building rules, see Dubai Municipality. FAQs Does a snagging inspection test the lift itself? Not the machinery. A snagging inspection records how the lift rides, stops and opens, checks the cabin, landings and power supply, and notes visible faults. Testing brakes, ropes, controllers and door safety needs a licensed lift company. Ask both to share their findings so the developer gets one clear list. What should I do if the lift stops between floors? Stay calm and press the alarm button or call the number shown in the cabin. Do not try to force the doors open or climb out. Wait for the lift company or emergency help. After any incident, keep the lift out of use until a technician has checked it. Who should service a private lift after handover? A lift company that services your lift’s make, usually under a maintenance contract. Ask the developer or installer who maintained it before handover and whether that arrangement continues. Keep a record of every service visit, as it helps with warranty claims and if you sell the villa later. Handing Over a Villa With a Private Lift? Tell us your handover date and how many floors your lift serves, and we will plan the inspection. Fees are quoted after a short scope call, with all costs listed upfront. ask for a quote
Villa Snagging in Dubai: Inside-Out Inspection Checklist

Villa Snagging in Dubai: Inside-Out Inspection Checklist Updated 10 October 2026Checklist6 min read Villa snagging in Dubai means checking a new villa from the roof down to the garden, then every room and system, before you accept it from the developer. A villa has far more to inspect than an apartment, so the order you work in matters. Start outside, move inside floor by floor, and test the systems last. In this guide Why a villa is different The inside-out checklist What you can check vs the inspector When to book FAQs This checklist is the order Dubshy’s inspectors suggest owners follow. Use it on your own walk-through, or as a way to see what a professional inspection should cover. Why Is Villa Snagging in Dubai Different From an Apartment? A villa is a whole building, not one unit inside a tower. That changes what you are responsible for checking. You own the outside. The roof, facade, garden and boundary walls are part of your property, not a shared area. More floors, more stairs. Each level has its own rooms, wet areas and finishes to check. More systems. Several AC units, a water heater, outdoor lighting and sometimes a pool all need testing. Water comes from more directions. Rain on the roof, irrigation in the garden and wet areas on upper floors can all find their way inside. For a side-by-side view, see our guide to villa vs apartment snagging. The Inside-Out Villa Checklist Work outside first while the light is good, then go inside from the top floor down, and test the systems once they have been running for a while. Photograph every problem and note exactly where it is. 1. Roof and terraces Drains. Outlets are clear, not blocked by debris or construction waste. Surface. No cracks, lifted joints or patches where water could sit. Parapets and edges. Coping and sealant are complete, with no gaps along the walls. Staining below. Check the ceilings under terraces for marks or damp patches. Our guide to roof and wet-area waterproofing covers this in more detail. 2. Facade, windows and external doors Walls. Look for cracks, uneven render and paint defects, especially around openings. Windows. Each one opens, closes and locks, with sealant complete around the frame. Main and garden doors. They close fully, lock, and keep out dust and light at the edges. 3. Garden, driveway and boundary Levels. Ground and paving should fall away from the villa, not towards it. Paving. No loose, cracked or sunken slabs on the driveway and paths; see our driveway and paving checks. Boundary walls and gates. No cracks or leaning sections; gates open and lock. Outdoor taps and lights. Each one works. 4. Pool and pump room (if you have one) Visible finish. Tiles and copings are complete, with no cracks or loose pieces. Pump room. No leaks or standing water around the equipment. Running test. Ask for the pool to be filled and running on the day, so the equipment can be seen working. More in our guide to pool checks. 5. Inside, floor by floor Stairs and rails. Handrails and balustrades are firm, with no movement when pushed. Floors, walls and ceilings. Look for dips, hollow-sounding tiles, cracks and paint defects. Joinery. Doors, wardrobes and kitchen units open, close and line up. See common villa joinery defects. Wet areas. Run every shower, basin and bath; water should drain fully and sealant should be complete. 6. Systems AC. Every unit starts, and every room cools. Water. Pressure and hot water work at every outlet, on every floor. Electrical. Sockets and switches work, and the distribution board is labelled. Rather hand the whole list to an engineer? book a villa inspection What Can You Check Yourself, and What Needs an Inspector? You can spot most visible problems on your own. What you cannot do safely or reliably is reach high areas, test hidden moisture or check electrical safety. Area You can check Leave to the inspector Roof Ceiling stains below terraces Roof surface, drains and parapets where access is unsafe Facade Cracks and paint at ground level Upper-level walls and window seals Garden Loose paving, gates, outdoor taps Falls and levels across the plot Wet areas Drainage, sealant, visible leaks Hidden moisture behind finishes Electrical Lights and sockets switch on Socket wiring and board safety tests AC Each room feels cool Airflow and supply readings A full snagging report records every item with a photo and its exact location, so the developer’s team can find and fix it. Where an inspection stops An inspection does not open walls, slabs or buried pipes. Roofs are checked only where access is safe. If cracks look structural, ask a structural engineer before you accept the villa. When Should You Book a Villa Inspection? Book as soon as the developer sends your handover notice, so the inspection happens before you sign. Then: Confirm services are onPower, water and AC must be running, and the pool filled if you have one. Arrange accessAgree a date with the developer’s handover team for the inspector to enter the villa. Send the reportSubmit the findings in writing and keep the acknowledgement. Re-check before signingAccept the villa only when the listed items are fixed. For official information on buying property in Dubai, see the Dubai Land Department. FAQs How long does a villa snagging inspection take? It depends on the villa’s size, the number of floors and whether it has a pool, roof terrace or large garden. A villa takes longer than an apartment because there are more rooms, outdoor areas and systems to test. Ask for a time estimate when you book, and keep the day free if you plan to attend. Can I get a second opinion on the developer’s snag list? Yes. The developer’s list is their own record. An independent inspection checks the same villa again and records anything missing, with photos and exact locations. Send the extra items to the developer in writing, so both lists
Cosmetic vs Functional Defects: How Dubai Snags Are Rated
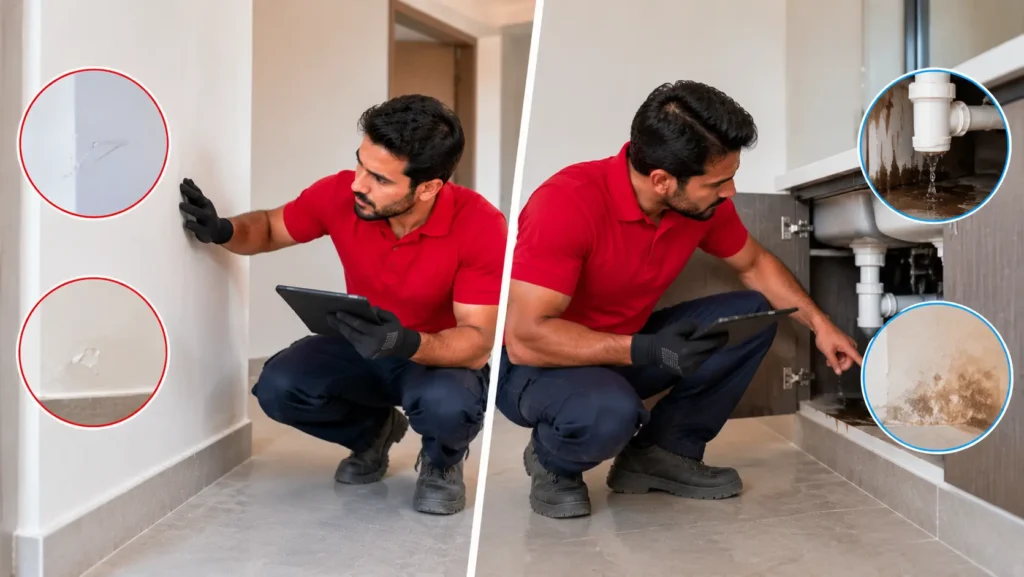
Cosmetic vs Functional Defects: How Dubai Snags Are Rated Updated 9 October 2026Comparison5 min read The difference between cosmetic vs functional defects is simple: a cosmetic defect spoils how something looks, while a functional defect stops it working as it should. A third group, safety defects, can put people at risk. Knowing which is which helps you decide what to push the developer on first, without dropping the smaller items from your list. In this guide The three types of defect Examples from Dubai apartments When cosmetic is not just cosmetic What to push for first Why every defect still goes on the list FAQs Cosmetic vs Functional Defects: What Is the Difference? The test is what the defect affects: appearance, use or safety. Ask whether the item still does its job and whether anyone could be hurt by it. Safety Could cause injury, fire, flooding or electric shock. Fix before anyone lives in the home. Functional Something does not work as it should: a drain, a door, a socket, the AC. Cosmetic Works fine but looks wrong: marks, scratches, uneven paint, poor finishing. What Do These Defects Look Like in a Dubai Apartment? The same room can hold all three types. These are typical items an engineer looks for, not results from a specific property. Defect Type Why Exposed wiring in a socket box Safety Risk of electric shock Loose balcony railing Safety Risk of a fall Shower drain that does not clear Functional Water sits on the floor and can spread Bedroom that does not cool Functional The AC is not doing its job Door that will not lock Functional The door cannot secure the room Paint drips on a wall Cosmetic Looks poor; the wall is unaffected Scratch on a kitchen cabinet Cosmetic Finish damage only When Is a Cosmetic Defect Not Just Cosmetic? Some defects look cosmetic but can turn into functional problems. These are the ones owners most often wave through, so check them twice. Gaps in silicone sealant. A small gap around a shower tray or basin looks untidy, but it can let water get behind finishes. A cracked tile. One crack may be surface damage, or a sign the tile is not fully bedded and will move. Hairline cracks in walls. Most are in the surface finish, but a crack that widens or returns after painting needs an engineer’s opinion. Scratched window glass. A scratch is cosmetic; a chip at the edge of a pane is worth checking more closely. A door that rubs the frame. It may only mark the paint now, but it can stop the door closing properly later. What Should You Push the Developer on First? Push safety items first, then functional ones, and keep cosmetic items on the same list. This order protects the people living in the home and the things you use every day. SafetyAsk for these to be fixed before you move in, and confirm each repair yourself. FunctionalAgree repair dates in writing and test each item again once it is fixed. CosmeticKeep them on the list. After you move in, it can be harder to show a scratch or chip was there at handover. Not sure which type a defect is? ask an engineer Why Does Every Defect Still Go on the List? Because the list is your record. A developer can only be asked to fix what was reported, so small items left off at handover are easy to dispute later. Our snagging reports record every item with a photo, its location and its severity, so you can see at a glance which ones matter most. Our guide on reading the ratings in a report explains each level. If you are unsure which document you need, read our comparison of a snag list vs snagging report. Where a label is not enough A severity label is a guide, not a legal judgement. Whether the developer must repair an item depends on your sale agreement and when it was reported. For disputes, take legal advice; for cracks that grow or a structure that seems to move, ask a structural engineer. For official information on buying property in Dubai, see the Dubai Land Department. FAQs Will the developer fix cosmetic defects? Report them anyway, with a photo and exact location, before you accept the unit. Whether each one is repaired depends on your sale agreement and when you report it. Cosmetic items left off the handover list are harder to raise later, because it becomes difficult to show they were there before you moved in. Is a hairline crack a cosmetic or functional defect? Usually cosmetic, if it sits only in the paint or plaster surface and does not grow. Mark both ends of the crack with a pencil and date it. If it widens, returns after repainting or appears with doors that start sticking, ask an engineer to assess it before you treat it as cosmetic. Who decides whether a defect is cosmetic or functional? The inspector rates each item in the report based on what it affects: appearance, use or safety. The developer’s team may see some items differently. A clear photo, an exact location and a short reason for the rating make it easier to agree what needs fixing and in what order. Want Every Defect Rated Before Handover? Dubshy’s specialists inspect your home and rate each item so you know what to push for first. Fees are quoted after a short scope call, with all costs listed upfront. reach our engineers
Post Renovation Inspection Dubai: Final Payment Checklist
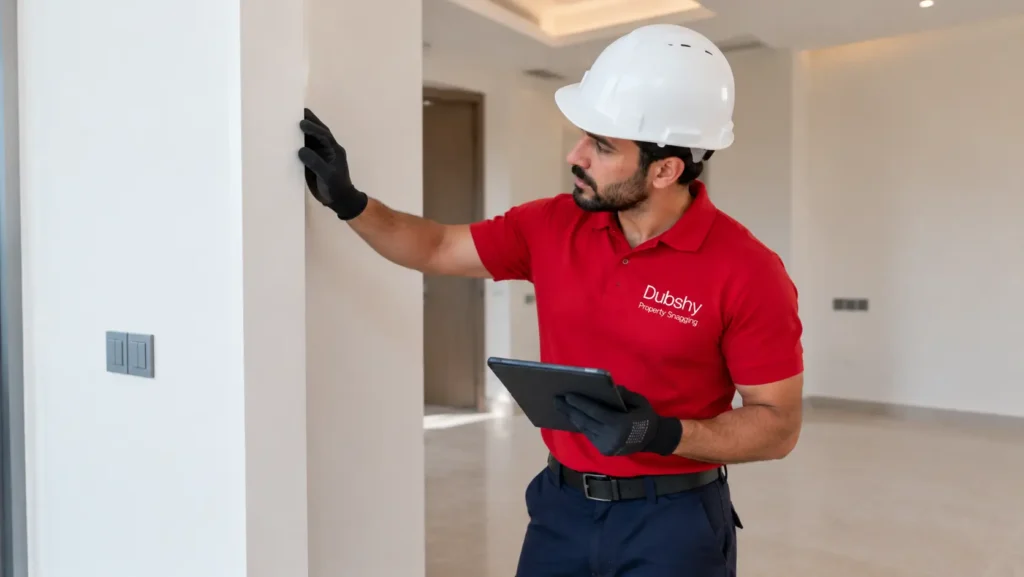
Post Renovation Inspection Dubai: Final Payment Checklist Updated 8 October 2026Checklist6 min read A post renovation inspection in Dubai checks your contractor’s finished work room by room before you release the final payment. It finds unfinished, faulty or unsafe items while you still have leverage to get them fixed. Use the checklist below, collect the right documents, and pay only when the agreed fixes are done. In this guide What the inspection checks Room-by-room checklist Documents to get before you pay Pay, hold or re-inspect? What an inspection cannot see FAQs A renovation is different from a new build. New work meets old work, services are cut and reconnected, and finishes are fitted around an existing layout. That is where problems tend to hide, and it is what Dubshy Property Snagging focuses on when it inspects a refitted home. What Does a Post Renovation Inspection in Dubai Check? It checks every trade the contractor touched, not only what looks finished. A civil inspection after works covers the build quality, and the engineer then tests the systems that were changed. Inspection scopeBy trade Civil and finishes Walls, ceilings, floors, tiling, paint, plaster Joinery Kitchen units, wardrobes, doors, worktops Wet areas Drainage, sealant, leaks, ventilation Electrical Sockets, switches, lighting, distribution board Plumbing Water pressure, hot water, drains, fittings AC Airflow and cooling in rooms where ducts or units were moved Room-by-Room Checklist Before the Final Payment Walk the home with this list before you check contractor work against the final invoice. Note each problem with a photo and its exact location. Kitchen Cabinets and drawers. Every door and drawer opens, closes and lines up with its neighbours. Worktops. Joints are tight, edges are sealed, and there are no chips or scratches. Sink and taps. Run the water, then look underneath for drips at every connection. Extractor and appliances. Each appliance switches on, and the extractor actually moves air. Bathrooms Drainage. Run the shower and basin and watch whether water clears or sits on the floor. Sealant and grout. Lines are continuous around the tray, bath, basin and toilet, with no gaps. Leaks. Check walls next to and below wet areas for damp patches or staining. Ventilation. The exhaust fan runs and pulls air when switched on. Floors, walls and ceilings Floors. Look for dips, raised tile edges and tiles that sound hollow. Our guide to floor level checks shows a simple method. Walls. Check paint for patches, drips and uneven colour; see painting and finishing checks. Where old meets new. Look closely at joins between new and existing plaster, tiles and ceilings for cracks or steps. Electrical, plumbing and AC Sockets and switches. Test each one, including any that were moved or added. Distribution board. Circuits are labelled to match the new layout. Water. Pressure and hot water work at every outlet. AC. Every room cools, especially where ducts, grilles or ceilings were changed. Want an engineer to run this list for you? book an inspection What Documents Should You Get Before You Pay? Ask for paperwork while the contractor still wants the final payment. Which documents apply depends on your contract and the work done, so treat this as a list of questions, not legal requirements. Ask for Why it helps Warranties Shows who to call if fittings, appliances or workmanship fail later Drawings of what was built Records where new pipes and cables run behind finished walls Any approvals the works needed Avoids problems with building management or a future sale Product and finish details Lets you match tiles, paint and fittings for future repairs Pay, Hold or Re-Inspect? Match each finding to an action before you pay. This keeps the decision about the work, not about opinions. Type of finding Example Action Safety Exposed wiring, a socket that fails a test, a leak Do not pay until fixed and re-checked Functional Slow drain, door that will not close, room that does not cool Agree a fix date in writing; re-inspect before paying Cosmetic Paint drips, scratched worktop, gaps in sealant Add to the fix list; agree with the contractor how it affects payment Record agreed fixes on a simple snag list template so both sides work from the same list. Then follow this order: InspectGet a full report with photos and locations once the contractor says the work is finished. Share the listSend it to the contractor in writing and agree what will be fixed and by when. Re-checkConfirm each item is fixed properly, not just covered up. PayRelease the final payment once the agreed items are closed, as your contract allows. What Can an Inspection Not See? Where the inspection stops An inspection does not open walls, floors or ceilings. Pipes and cables already covered are checked through what can be tested, such as water flow, drainage, moisture signs and electrical tests. Contract and payment disputes need a lawyer, not an inspector, and a cracked or moving structure needs a structural engineer. For official building rules, see Dubai Municipality. FAQs When should I book a post renovation inspection? Book it once the contractor says all work is finished and before you sign off or release the final payment. Power, water and AC should be running so the systems can be tested. If you plan to move in soon, leave time for the contractor to fix items and for a re-check before you pay. Can I hold back part of the final payment until snags are fixed? That depends on your contract. Read what it says about the final payment, any retention and the defects period, and agree any hold-back in writing with the contractor. For a dispute about money owed, speak to a lawyer. An inspection report gives both sides the same list of items to work from. Do I need to be there during the inspection? No, but it helps to attend the end of the visit. The engineer can show you the main findings in person and answer questions. If you cannot be there, you
Uneven Floor in a New Dubai Apartment? How to Check 2026

Uneven Floor in a New Dubai Apartment? How to Check Updated 7 October 2026How-to guide7 min read An uneven floor in a new apartment in Dubai is something you can check yourself in about an hour with a marble, a long straight edge and a spirit level. These checks show where a floor dips or slopes. They do not prove the floor is outside tolerance, so mark what you find, report it in writing and book a measured check if the problem is clear. Quick answer: roll a marble, lay a straight edge, read a spirit level, and mark every spot where the floor dips, slopes or rocks. Photograph each one, list it by room, and send it to the developer before you sign the handover. In this guide Signs your floor is not level How to check the floor yourself Check the walls on the same walk Uneven floor or uneven tiles? How to record and report it When a DIY check is not enough FAQs Owners usually notice the problem by feel before they see it. Some buyers have described the same thing in public reviews of new Dubai homes, saying the floor and ceiling felt uneven and the balcony did not drain properly. This guide from Dubshy turns that feeling into a short, room-by-room check you can do before handover. What Are the Signs Your Floor Is Not Level? The signs show up in how things sit and move on the floor. Use this table to match what you notice with the check that confirms it. What you notice Where to look Check to use A dip you can feel underfoot Middle of rooms, corridors, doorways Straight edge laid across the spot Furniture or a table that wobbles Living and dining areas Spirit level in two directions A door that scrapes or leaves a gap at the bottom Under internal doors Spirit level across the threshold, then on the door frame Gaps under skirting boards Along walls, often in corners Straight edge along the wall line A tile edge you can catch with your foot Between neighbouring tiles Straight edge across the joint Water that runs or pools in one place Balcony, near doors Pour a little water and watch where it goes How to Check an Uneven Floor in a New Apartment in Dubai Start with the quickest test and use the slower ones only where something looks wrong. Do one room at a time and keep a pencil or masking tape ready to mark spots. Clear the floorRemove boxes and rugs so you can see the whole surface and lay tools flat. Roll a marblePlace it in the middle of the room and in each corner. If it always rolls the same way or settles in one spot, mark that area. Lay a straight edgeUse the longest straight piece you have, such as an aluminium rule or a level. Lay it across each marked spot and look for daylight underneath. Read a spirit levelPlace it in two directions at each marked spot. Note which way the bubble moves and how far. Mark and photographTape the outline of each problem area and take a photo with the tool in place, so the gap is visible. The marble test The marble test is fast and shows direction, but it is sensitive to tiny slopes and to grout lines. Treat it as a way to find where to look, not as proof. Straight edge and spirit level A straight edge shows a dip as a gap under the middle of the tool. A spirit level shows a slope across a wider area. Used together, they tell you whether you have a local dip or a whole floor that falls one way. A phone level app works for a rough reading, but its accuracy depends on the phone and its case. How to Check If Walls Are Straight in a New Apartment Do the walls on the same walk, because a floor problem and a wall problem often show up at the same door or corner. Hold the spirit level upright against each wall and each door frame and check whether the bubble sits in the centre. Door frames. A frame that leans can make a door swing open or closed on its own. Long walls. Lay the straight edge flat on the wall and look for bows or hollows. Corners. Check where floor and wall meet; a gap that grows along the wall points to a floor that falls. Is It an Uneven Floor or Just Uneven Tiles? It matters which one you have, because the fix is different. If the straight edge rocks on a single raised tile edge but sits flat across the rest, the problem is likely in the tiling. If the gap runs across several tiles or the spirit level shows a fall across the room, the layer below the tiles may be out of level. Keep the two apart in your list Write tile edge problems and floor level problems as separate items. It helps the developer send the right trade. For cracked tiles, grout and other finish issues, see our guide to common flooring defects. How Should You Record and Report It? Report every marked spot in writing, with enough detail that someone who has never seen the unit can find it. Room and location. For example, “bedroom 2, 1 m from the window wall, centre of room”. What you saw. Marble roll direction, gap under the straight edge, spirit level reading. Photo. One wide shot of the room and one close-up with the tool in place. Date sent. Submit through the developer’s handover team or portal and keep the acknowledgement. If you have already moved in, report new problems in writing as soon as you notice them. Our snagging tips for the first year explain what to keep an eye on after handover. For official information on property buying in Dubai, see the Dubai Land Department. When Is a DIY
Snagging in Dubai Creek Harbour: A Handover Case Study
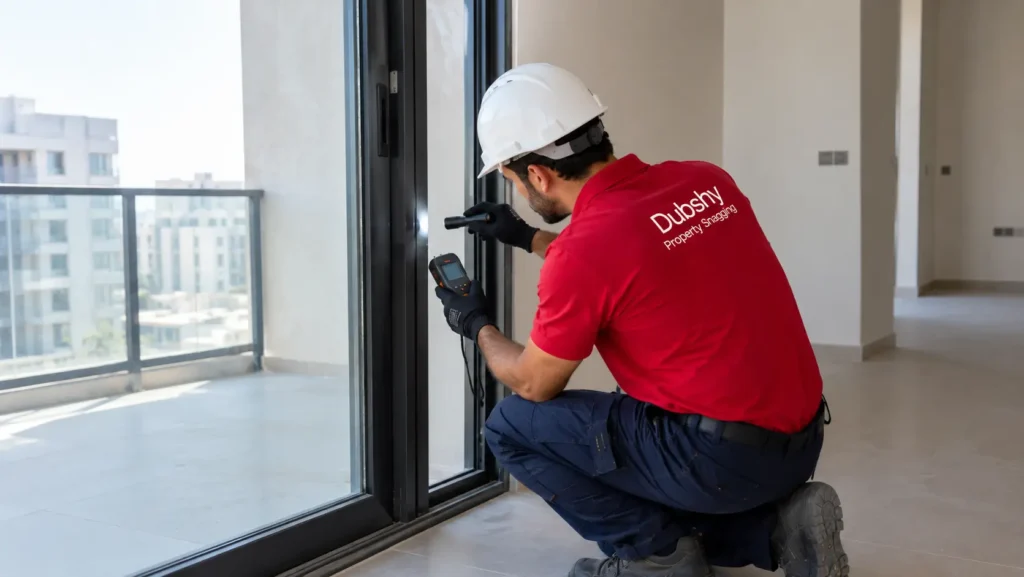
Snagging in Dubai Creek Harbour: What Gets Checked Updated 6 October 2026Community guide5 min read Snagging in Dubai Creek Harbour means checking a high-rise apartment before you accept it from the developer: power, water, cooling, wet areas, finishes, windows and the balcony. Most units here are in towers, so the checks that matter most are the ones that only show at height. If you are planning snagging in Dubai Creek Harbour, this guide walks through an example inspection and how the findings reach the developer. In this guide What makes a tower handover different An example inspection, area by area How findings reach the developer What one inspection can’t tell you What Creek Harbour buyers should do FAQs Snagging Dubai Creek Harbour: What Makes a Tower Handover Different? A tower apartment shares more with the building around it than a villa does. Cooling, water and drainage connect to shared systems, the balcony sits high above the ground, and the glazing has to keep out wind-driven rain and dust. An inspection therefore looks beyond the finishes inside your unit to the points where your apartment meets the building. Access also takes more planning. The engineer needs an inspection slot from the developer’s handover team, entry through building security, and the unit’s power, water and cooling running on the day. Without those, important tests have to wait for a second visit. An Example Inspection, Area by Area Here is how Dubshy’s specialists would typically work through a two-bedroom tower apartment. The table lists what is checked in each area and the kind of issue the engineer is looking for, not results from a real unit. Area What is checked What the engineer looks for Arrival Power, water and cooling switched on; AC started in every room Services that are not connected, so later tests can be planned Bathrooms and kitchen Taps, showers, basins, toilets, drains, sealant around fittings Slow drains, poor floor slope, gaps in silicone, signs of seepage Living areas and bedrooms Walls, ceilings, floors, doors, wardrobes Hollow or uneven tiles, paint and plaster defects, doors that bind Windows and balcony doors Opening, locking, seals and frame sealant Gaps that let in dust or water, scratched glass, stiff sliding tracks Balcony Floor slope, drain outlet, railing fixings, tile finish Water that pools instead of draining, loose railings, chipped tiles Systems Sockets, distribution board, AC supply air, water pressure, hot water Wiring faults, rooms that do not cool, weak pressure Ceilings near shared shafts Thermal camera and moisture meter Moisture that may come from services or the unit above For the full order of an apartment visit and why it matters, see how an apartment inspection runs. How Do the Findings Reach the Developer? Every finding is recorded with a photo, an exact location and a severity rating, so the developer’s team can find and fix it without a site visit to understand it. Our guide to severity ratings in the report explains how items are ranked. Inspect before you acceptA pre-handover inspection gives the developer time to repair items before you sign. Submit in writingSend the report through the developer’s handover team or portal and keep the acknowledgement. Re-check the repairsA follow-up visit confirms each item was fixed properly. Defects that appear later can still be reported during the Defect Liability Period, which for installations is usually 12 months from handover; the Dubai Land Department oversees developer obligations. What Can’t One Inspection Tell You? One inspection describes one unit on one day. It is not a verdict on a tower, a community or a developer, and two units on the same floor can be very different. Where an inspection stops Engineers test your unit without opening walls or ceilings. Pipes inside slabs, sealed service shafts and the building’s central cooling supply sit outside that scope. If readings point to a leak with no visible source, a specialist leak detection visit may be needed; if cracks look structural, ask for a structural engineer’s opinion before accepting the unit. What Should Creek Harbour Buyers Do? Book early. Ask the developer for an inspection slot as soon as the handover notice arrives. Get services running. Confirm power, water and cooling will be on for the visit. Spend time on the balcony and windows. At height, drainage and seals matter more than in low-rise homes. Keep everything in writing. Submissions, replies and repair dates are your record. Re-check before signing. Accept the unit only when the listed items are fixed. The same approach applies to snagging across Dubai communities, with checks adjusted to each building type. FAQs Do I need to be in Dubai for the inspection? No. Many Creek Harbour buyers live abroad and let the engineer attend with the developer’s handover team. You receive the full photo report afterwards and can send it to the developer yourself. Being present helps if you want to see defects first-hand, but it is not required for the inspection to go ahead. How long does a tower apartment inspection take? A one-bedroom apartment usually takes about two to three hours on site, and larger units take longer because there are more rooms, bathrooms and AC units to test. Time also depends on whether power, water and cooling are working when the engineer arrives. What if problems appear after I move in? Report them to the developer in writing as soon as you notice them. Installation defects are usually covered for 12 months from handover under the Defect Liability Period. An inspection before that period ends records anything that has appeared since you moved in, while the developer must still repair it. Inspecting a Creek Harbour Apartment? Share your handover date and unit size, and we will plan a visit before you accept the keys. Fees are quoted after a short scope call, with all costs listed upfront. arrange an inspection
Apartment Snagging in Dubai: How the Inspection Works

Apartment Snagging in Dubai: How the Inspection Works Updated 5 October 2026Snagging process7 min read An apartment snagging inspection is a 2 to 3 hour visit, for a one-bedroom unit, in which an engineer tests the apartment before you accept it: power, water, AC, drains, finishes, doors, windows and the balcony. Most of the value comes from testing, not looking. If you are comparing apartment snagging Dubai services, this guide shows how a visit runs, what has to be ready beforehand, and what an inspection cannot check. In this guide What has to be ready before the visit How the inspection runs on the day What an apartment inspection can’t check Serviced apartments and buy-to-let units What happens after the visit FAQs Apartment Snagging Dubai: What Has to Be Ready Before the Visit? An inspection can only test what is switched on and accessible. Many developers allow a walkthrough one to two weeks before the handover date, and that is the best time to book. Before the engineer arrives, check these points with the developer’s handover team: An inspection slot in writing. Confirm the date, time and that your inspector may attend with you or on your behalf. Power and water connected. Without a live DEWA connection, sockets, lights, water heaters and pressure cannot be tested. Cooling running. Ask that the AC can be operated during the visit. If the building uses district cooling, check how the cooling supply is activated for your unit. Building access. Let building management know the visit is happening, so the engineer can get through security and park. Your specification. Keep the Sale and Purchase Agreement and floor plan to hand, so finishes and fittings can be checked against what you bought. If any of these are missing on the day, ask for the untested items to be listed in writing so they can be checked at a second visit. How Does the Inspection Run on the Day? A good inspection follows an order, because some tests need time to show a result. Here is how the Dubshy team approaches an apartment visit, and why each stage sits where it does. Arrival and the services check The first job is to confirm power, water and cooling are working, then switch the AC on in every room. AC units need time to reach a steady temperature, so turning them on first means they can be measured properly later in the visit rather than in the first few minutes. Wet areas and drainage Bathrooms, the kitchen and the laundry area come next. Taps are run, showers and basins are filled and drained, and toilets are flushed. Doing this early gives slow drains, poor floor slopes and seepage around fittings time to show while the rest of the apartment is inspected. Room by room The engineer then works through each room: walls and ceilings, floors and skirting, doors and wardrobes, windows and their seals. Floors are tapped for hollow tiles and checked for level. The full list of items is in our apartment handover checklist, so it is not repeated here. Systems testing This is where an inspection earns its fee, because none of it can be judged by eye: System What is tested Why it matters Sockets and switches Every point with a socket tester Wiring faults are invisible from the faceplate Distribution board Breakers, labelling, signs of overheating A wrongly labelled board makes every later repair harder Air conditioning Supply air from each unit, airflow, noise, condensate drain A unit can run and still not cool the room Water Pressure with several taps open, hot water, drainage speed Low pressure and slow drains rarely improve after handover Hidden moisture Thermal camera and moisture meter on suspect walls and ceilings Leaks behind finishes show here before stains appear For more on the cooling side, see our guide to testing the AC at handover. Balcony and the building around your unit The visit ends outside the unit’s rooms: balcony drainage, floor slope and railings, the sealant around windows and balcony doors, and any signs of water coming in from the apartment above, such as stains on ceilings near shared walls or service shafts. Your part during the visit If you attend, walk the apartment with the engineer rather than waiting at the door. Point out anything you noticed at earlier viewings, and check that fittings match your specification: tile types, kitchen appliances, wardrobe layouts and the number of sockets. Ask questions as defects are found, because it is easier to understand a problem while you are looking at it. Keep your own notes short; the report will record locations and photos for every item. Handover date confirmed? Lock in your inspection slot early. book an apartment inspection What Can’t an Apartment Inspection Check? An apartment inspection covers your unit, tested without damaging anything. Some things sit outside that scope: Can check Can’t check, or only note Everything inside the unit that can be operated or measured Pipes and wiring inside walls or slabs, without opening them up Signs of moisture with thermal and moisture readings The exact source of a leak inside a sealed shaft or the unit above Cooling performance at the unit The building’s district cooling plant or chilled water supply Visible defects in corridors and lifts, as observations Common areas as a formal part of your snag list When someone else should step in If readings point to an active leak with no visible source, a specialist leak detection visit may be needed. If cracks look structural rather than cosmetic, ask for a structural engineer’s opinion before you accept the unit. Serviced Apartments and Buy-to-Let Units Serviced apartment snagging in Dubai follows the same visit, with two extra points. If an operator or furnishing package is involved, check the furniture and appliances against the agreed inventory during the same visit, because missing or damaged items are harder to claim once guests or tenants arrive. And agree who will report defects to the developer and
What Developers Are Not Responsible to Repair in Dubai

What Developers Are Not Responsible to Repair in Dubai 3 October 2026Developer liability8 min read You have the keys, you have started living in the property, and the list of problems keeps growing. Before you email the developer about all of them, it helps to know what developers are not responsible to repair. Dubai law gives buyers strong protection for structural defects and faulty installations, but it does not make the developer pay for everything. In short, developers are generally not responsible for normal wear and tear, damage caused by owners or their contractors, appliances covered by a manufacturer’s warranty, consumable parts, and non-structural defects reported after the one-year installation period. This guide explains each exclusion, the grey areas where most disputes start, and how to protect your claim. Developer liability at a glanceOwner’s guide Developer must fix Structural defects and faulty MEP installations, within the legal periods Owner usually pays for Wear and tear, misuse, modifications, appliances and consumables Key time limits 1 year for installations, 10 years for structural parts Best protection A dated inspection report and written notice to the developer In this guide What developers must repair What developers are not responsible for Grey areas and disputes If you bought resale How to protect your claim FAQs What Developers ARE Responsible For To understand the exclusions, start with the baseline. For apartments and other jointly owned properties, Dubai Law No. 6 of 2019 (Article 40) sets two minimum developer obligations: 10 years for structural parts: foundations, columns, load-bearing walls and other structural elements, counted from the date the project received its completion certificate. 1 year for installations: mechanical, electrical, plumbing, sanitary and sewerage installations, counted from the date the unit was handed over. If the owner refuses to take possession, the year runs from the completion certificate instead. Any agreement that tries to cut these protections is void, and your Sale and Purchase Agreement (SPA) may add further warranties on top. For the wider picture of what you can demand at handover, see your handover rights under RERA. Worth knowing Under the UAE Civil Transactions Law, contractors and supervising engineers can also be liable for serious structural defects for 10 years, with claims to be brought within 3 years of discovering the defect. If you suspect a structural problem, do not wait. Confirm your position with a lawyer. What Developers Are Not Responsible to Repair Outside those obligations, here is what developers are not responsible to repair, Dubai handover by handover. These are the exclusions that come up most often. Normal wear and tear Once you live in a property, it ages. Scratched flooring, marks from moving furniture, chipped paint, sun-faded finishes and worn grout are part of ordinary use. They are the owner’s responsibility, even inside the first year. Damage from misuse or poor maintenance Developers are not liable for problems caused by how a property is used or maintained. Typical examples are AC units that fail because they were never serviced, drains blocked by grease or debris, mould caused by closed-up rooms with no ventilation, and leaks from sealants that were never renewed. A clogged AC filter is a maintenance issue, not a construction defect, so the repair cost falls on the owner. Owner modifications and outside contractors Kitchen remodels, false ceilings, extra lighting, partition walls and smart-home installations all change the property from what the developer delivered. If that work damages pipes, wiring, waterproofing or finishes, the developer is not responsible, and it may refuse related claims in the same area. Appliances under the manufacturer’s warranty Built-in ovens, hobs, dishwashers, washing machines and water heaters usually carry the manufacturer’s warranty, not the developer’s. Faults go to the manufacturer or its local agent, and once that warranty ends the cost is yours. Consumable parts Light bulbs, AC filters, batteries, shower heads, tap cartridges and periodic silicone renewal are routine maintenance items. They are the owner’s cost from day one. Cosmetic issues accepted or reported late Minor shade differences in tiles, small scratches and hairline paint cracks should be recorded before or at handover. Raised months later, they are hard to prove as pre-existing, and developers often reject them. Installation defects after the first year This is the exclusion many owners miss. Once the one-year installation period ends, a failing pump, faulty wiring or a leaking pipe connection is usually no longer the developer’s cost, unless it is structural or your SPA gives a longer warranty. That is why it pays to inspect before the first year ends. Outdoor wear on villas and townhouses Gardens, paving, boundary walls and external paint take the full force of Dubai’s sun, heat and occasional heavy rain. Faded exterior paint, landscaping that dies back, minor paving movement and irrigation damaged by use are usually treated as maintenance, not construction defects. Poor drainage slopes or cracked boundary walls from bad construction are a different matter, so have them checked early. Leaks from neighbours and common areas Water coming through your ceiling from the unit above is normally the neighbour’s responsibility, or their insurer’s. Common areas are maintained by the building’s management company, funded through service charges. Unless the cause is a construction defect within the legal periods, it is not a developer repair. Grey Areas: Where Most Disputes Start The same symptom can be the developer’s problem or the owner’s, depending on the cause. The cause is what matters, and it usually takes an engineer to prove it. Thermal imaging and moisture readings show whether a leak comes from a construction defect or from use and maintenance. Issue Usually the developer’s if… Usually the owner’s if… Water leak A pipe joint or waterproofing failed within the first year Sealants were not maintained, or a contractor damaged a pipe AC not cooling Poor installation, undersized units or duct leaks from the start No servicing, blocked filters or drains Wall cracks Structural, recurring or widening Hairline plaster cracks after year one, or from renovation work Peeling paint Poor surface preparation, visible
Building Inspection Dubai: Types, Process and Rules
Building Inspection Dubai: Types, Process and Rules 2 October 2026Building inspections8 min read Search for building inspection Dubai and you will find two very different services behind the same words. For a developer, it means the authority visits that move a project from foundations to a completion certificate. For an owner or buyer, it means an independent engineer checking whether a building, or a unit inside it, is in the condition it should be. This guide explains both: who regulates buildings in Dubai, the inspection stages during construction, the private inspection types owners can order, and how to choose the right one. Building inspection at a glanceOwner’s overview Two meanings Authority inspections during construction, and independent inspections for owners Who regulates Dubai Municipality, DDA or Trakhees, depending on the area When owners need one Before handover, before buying, after works or when defects appear What you get A written report with photos, locations and recommended fixes In this guide What building inspection Dubai covers Who regulates buildings in Dubai Authority inspection stages Independent inspection types How an inspection works What inspectors examine Who needs one FAQs Building Inspection Dubai: What the Term Covers The term covers two different activities that happen to share a name. Regulatory inspections are carried out by, or on behalf of, the authority that issued the building permit. They check that construction follows the approved drawings and codes at set stages. Without them, a project cannot get its completion certificate or be connected to utilities. Independent inspections are ordered by owners, buyers, owners’ associations or investors. They are not a legal requirement. They exist to protect whoever is paying: to find defects before handover, before a purchase, after renovation work, or when something in the building starts to go wrong. A building can pass every regulatory stage and still be handed over with leaks, faulty sockets and poor finishes. That gap is what independent inspections are for. Who Regulates and Inspects Buildings in Dubai Dubai does not have a single building authority. Which body approves and inspects a project depends on where it sits. Dubai Municipality Dubai Municipality issues building permits and carries out construction inspections for most of mainland Dubai. It also administers the Dubai Building Code, which sets the technical baseline for design and construction across the emirate. Dubai Development Authority (DDA) The DDA regulates planning and construction in the areas under its jurisdiction. Its published services run from demolition, shoring and piling inspections through structural inspection to the building completion certificate, with separate certificates for building modifications, maintenance work and fit-outs. Trakhees Trakhees, part of Ports, Customs and Free Zone Corporation (PCFC), plays a similar role in the areas it regulates, including approvals and inspections for construction and modification works. Dubai Civil Defence and DEWA Dubai Civil Defence approves and inspects fire and life safety systems under the UAE Fire and Life Safety Code. DEWA handles electricity and water connections, which depend on the building passing its inspections and completion stage. Check your area first Authority boundaries follow the master plan, not the community name on a brochure. Before starting any works or ordering an approval, confirm which authority covers your plot through the developer, the master community or the authority’s own website. Authority Inspection Stages During Construction For a new building, regulatory inspections follow the construction sequence. Details vary by authority, but the pattern is broadly the same: Shoring and pilingBefore the building rises, the authority checks the temporary works that hold back the excavation and the piles that will carry the load. Structural inspectionThe frame, slabs, columns and beams are checked against the approved structural drawings. This stage is the backbone of the approval process; our guide to structural inspection in Dubai explains what engineers look at. Services and fire systemsMEP installations and fire and life safety systems are tested and approved, including the Civil Defence inspection. Building completion certificateOnce everything is approved, the authority issues the completion certificate. The building can then be connected, occupied and handed over to buyers. Later changes follow their own inspections too. Modifications, major maintenance and fit-outs each need approval and, in DDA areas, a separate completion certificate. That matters for commercial tenants fitting out an office, who need both an authority sign-off and, ideally, an independent snag of the contractor’s work. Types of Independent Building Inspection Independent inspections are where owners and buyers have a choice. Most building inspection Dubai requests from owners fall into one of these types, and each answers a different question: Inspection type When Usually ordered by Pre-handover snagging Before accepting a new unit or building from the developer Buyers, investors, developers Pre-purchase (resale) Before buying a lived-in property Buyers Building condition audit For existing buildings, planning maintenance or budgets Owners’ associations, landlords, investors Defect investigation When leaks, cracks or failing systems appear Owners, facility managers Post-renovation After works, before the final payment Homeowners, tenants Commercial fit-out Before accepting a fitted-out office or shop Tenants, landlords For resale homes, our guide to checks before buying a resale home covers what changes when there is no developer warranty. For existing buildings, a detailed condition report is often the right starting point for owners’ associations planning repairs and reserve funds. How an Independent Building Inspection Works Whatever the type, a professional building inspection Dubai engineers carry out follows a similar path: Scope and documentsAgree what is being inspected: one unit, a villa, a full floor or a whole building with common areas. Share any drawings, completion certificates and previous reports. Site visitEngineers work area by area: structure and finishes, MEP systems, facade and roof, common areas and plant rooms where access allows. TestingVisual checks are backed by instruments: moisture meters, socket and earthing testers, AC temperature readings and thermal imaging surveys for hidden leaks and insulation gaps. ReportEvery defect is photographed, located and rated by severity, with a note on the likely fix. Follow-upAfter repairs, a re-inspection confirms the work was done properly rather than just covered up. Dubshy’s civil inspection