
External Work Inspection Dubai: What Gets Checked
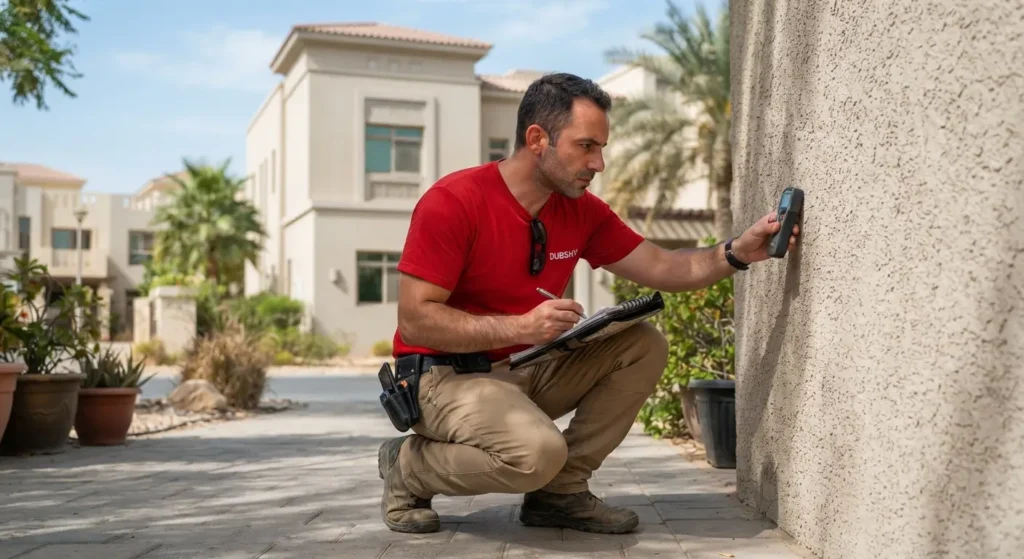
External Work Inspection Dubai: What Gets Checked 26 September 2026Guide3 min read External works cover everything on your property outside the main building structure but still within your boundary: driveways, boundary walls, external lighting, irrigation, and the building’s outward-facing walls. It’s not the neighbour’s problem, it’s your own property, and it’s the section of a snagging report buyers overlook most. In this guide The five external works categories Why this gets overlooked Driveways and boundary work What often gets missed How this fits into the full report FAQs The Five External Works Categories The table below breaks down what’s included and the issue we most often find in each category. Category What’s included Common issue found Driveways & hardscaping Drainage slope, surface finish, edge work Wrong slope pushing water toward the house Boundary walls & fencing Cracking, leaning, gate alignment Gaps or gates that don’t latch flush External lighting Garden and driveway circuits Lights that don’t work because of installation shortcuts on the external circuit Irrigation & outdoor plumbing Garden lines, outdoor taps, external drainage Slow leaks that show as a soggy patch rather than an obvious wet spot Exterior render & paint The building’s outward-facing walls Cracking or staining from direct climate exposure Why Does External Work Get Overlooked So Often? Buyers naturally focus attention inside the property during a walkthrough: kitchens, bedrooms, bathrooms, and the spaces they’ll actually spend time in. External areas get a passing glance at best, which is exactly why issues here go unnoticed more than almost anywhere else. A real example A villa buyer once read “external works” on his snagging report’s contents page and assumed it meant the neighbour’s fence. He genuinely thought it wasn’t relevant to him. It turned out to be where two of his more significant findings were sitting. Driveways and Boundary Work Deserve a Proper Look For driveways, the checks cover drainage slope, surface cracking, and edge work where the driveway meets the garden or garage. All of this falls under a driveway and garden inspection service. Boundary walls and fencing get even less attention. Look for cracking or leaning, gaps in fencing panels, and gate alignment, where a boundary gate doesn’t sit flush or latch properly. What Often Gets Missed Underground and Overhead External lighting circuits. Often wired with less care since they’re less visible. Irrigation and outdoor plumbing. Leaks show as a soggy garden patch rather than an obvious wet spot. Exterior render and paint. Checked for cracking or water staining on outward-facing walls. Three quick checks you can do yourself: Test every external light individually, not just the ones near the front door. Check irrigation lines and outdoor taps for slow leaks. Inspect exterior render for cracking, especially on walls facing prevailing weather. How Does This Fit Into the Full Snagging Report? An external work inspection service covers all of this as a distinct section of the snagging report. It is organised separately from internal findings, so a developer’s external works contractor can act on it without sorting through internal defects that belong to a different trade. External works are covered under the same Defects Liability Period rights as anything inside the property, but they’re claimed less often simply because buyers don’t think to check them. Our RERA handover rights guide covers what you’re actually entitled to have fixed, external works included. Want the outside checked properly? book an external work inspection FAQs About External Work Inspection Dubai Does external works coverage apply to apartments too? To a lesser degree, mainly balconies, terraces, and any private outdoor space attached to the unit. Villas simply have far more external area to cover. Why do external work issues get missed so often at handover? Buyers focus on the rooms they’ll use, such as kitchens, bedrooms and bathrooms, so the outside gets a passing glance at best. Many also assume “external works” means someone else’s property, when it actually covers the driveway, boundary walls, lighting and irrigation on their own plot. Is external works covered under the same DLP as the rest of the property? Yes. External works fall under the same Defects Liability Period rights as anything inside the property. They are claimed less often simply because buyers don’t think to check them. Does Dubshy include external works in every villa inspection? External works are reported as their own section of the snagging report, separate from the internal findings. Confirm the scope when you book so you know exactly what your villa inspection covers. Should buyers request an external works report separately, or is it part of the standard inspection? It is a distinct section of the snagging report rather than a separate document, which lets the developer’s external works contractor act on it directly. When you book, ask for it to be included so nothing outside the front door is left out. It’s Not the Neighbour’s Fence, It’s Yours Everything outside your front door still counts. External works are everything on your own property outside the four walls of the house, and it’s exactly the kind of thing that gets missed without a proper inspection. If handover’s coming up, it’s worth arranging an external work inspection so nothing outside the front door gets overlooked either. book an external work inspection
Palm Jumeirah Snagging Cost: A Realistic Price Guide
Palm Jumeirah Snagging Cost: A Realistic Price Guide 26 September 2026Price guide4 min read Buying on Palm Jumeirah usually comes down to a choice between two very different lifestyles: a private Frond villa with its own pool and beach access, or a high-rise apartment with sea views and shared facilities. What most buyers don’t realise until later is that these two property types also differ in how they should be inspected before handover, what typically goes wrong, and what a fair snagging budget looks like. In this guide Villas vs apartments Snagging checklist by property type Side-by-side comparison How much does it cost? The inspection process Common mistakes FAQs If you’re weighing up a villa against an apartment on the Palm, here’s what actually changes when it comes to property snagging on Palm Jumeirah, and what should be on your checklist either way. Why Does Snagging Work Differently for Villas and Apartments? Palm Jumeirah villas Villas on the Frond and Garden Homes clusters are standalone structures. Every system (plumbing, electrical, HVAC, waterproofing, pool equipment) is entirely the owner’s responsibility, and there’s no shared building management absorbing the risk of a hidden defect. The inspection has to extend much further: roof and terrace waterproofing, garden irrigation, pool filtration, boundary walls and private access points to the beach, as well as the usual internal checks. Palm Jumeirah apartments In tower-style apartments such as Shoreline, Oceana and Marina Residences, the building systems and structure are shared with hundreds of other apartments. Snagging here focuses on the unit itself: finishes, fittings, balcony drainage, air conditioning performance and window seals. The building’s facilities management covers the structure and common areas. These inspections are typically quicker, but they still bring to light developer shortcuts that are easy to overlook in a walkthrough. Palm Jumeirah Snagging Checklist by Property Type For villas Waterproofing. Roof, terrace and balcony. Pool. Pool shell, tiling, and the pump and filtration system. Garden. Drainage and irrigation lines. External walls. Cracks in external walls and boundary fencing. Beach access. Private beach or waterfront access points. Garage and exterior. Garage, driveway and external electrical fittings. For apartments Finishes and fittings. Inside the unit. Balcony. Drainage and sealant. Air conditioning. Performance and condensation. Windows. Window seals. Villa vs Apartment Snagging: A Side-by-Side Comparison Factor Villa Apartment Typical inspection time 4–6 hours 2–3 hours Checkpoints covered 400+ (full property) 400+ (unit-focused) Common defect areas Waterproofing, pool systems, external walls Balcony drainage, sealant, AC condensation Outdoor/structural scope Full: roof, garden, boundary Limited to the unit’s balcony or terrace Report turnaround 24–48 hours 24–48 hours For a wider look at the differences, see our guide to villa vs apartment snagging. How Much Does Palm Jumeirah Snagging Cost? Pricing depends mainly on size and property type rather than location alone, though Palm properties often sit at the larger end of the market, which affects the final figure. As a general guide: Property type Typical price Studio / 1-bed apartments Typically start from around AED 499–800 2–3 bed apartments Usually AED 900–1,400 Townhouses and smaller villas Often AED 1,500–2,200 Signature / Frond villas (larger footprint, pool, garden) Can run AED 2,500 and above, depending on plot size and included systems These are indicative ranges The exact quote depends on square footage, number of levels, and whether pool and garden systems are included. For a fuller breakdown across Dubai, our property snagging cost guide covers pricing by area and property type in more detail. Want an exact quote for your property? get a snagging quote What Does the Snagging Inspection Process Look Like? Book the inspectionBefore or shortly after handover, ideally before you sign off with the developer. On-site walkthroughUsing thermal imaging, moisture meters, and a 400+ point checklist tailored to villa or apartment scope. DocumentationEvery defect recorded with photos, location references, and severity ratings. Report deliveryWithin 24–48 hours, formatted for direct submission to the developer. Developer follow-upYou use the report to request rectification before the DLP (Defects Liability Period) window closes. Common Mistakes Buyers Make Treating villa and apartment snagging as identical. A checklist built for a unit will miss villa-specific risks like pool systems and external waterproofing. Skipping the pool and garden on villas. It seems like “landscaping, not construction”, but these systems can hide real defects. Assuming shared building systems are covered. Building-wide issues in apartments need to be raised with the OA or management, not just noted in your unit report. Waiting too long after handover. This can push you past the window for easy developer rectification under the DLP. FAQs About Palm Jumeirah Snagging Cost Is snagging different for a Frond villa compared to a Garden Home? Not drastically. Both need full waterproofing, pool, and boundary checks. Garden Homes may have slightly less external scope depending on plot size. Do apartment snagging inspections cover the building’s common areas? No. An apartment inspection is focused on your unit, while the building’s facilities management covers the structure and common areas. If you notice building-wide issues, raise them with the OA or management rather than relying on your unit report alone. How long does a villa snagging inspection take on Palm Jumeirah? Typically 4–6 hours, compared with 2–3 hours for an apartment. The exact time depends on the size of the villa, the number of levels, and whether the pool and garden systems are included. Can I use one snagging cost guide for both villas and apartments? Only as a rough starting point. Price depends mainly on size and property type, so villas generally cost more than apartments because there is more to inspect. Use the ranges above as a guide, then ask for a quote based on your exact property. What happens if defects are found after the DLP period ends? It becomes harder to ask the developer to fix them at their own cost, which is why timing matters. Report defects as early as you can, and check your sale agreement or take legal advice about your options if the period has already passed. Ready to
JVC Snagging Checklist: A Room-by-Room Guide
JVC Snagging Checklist: A Room-by-Room Guide 26 September 2026Checklist6 min read Picture this: you’ve just picked up the keys to your new apartment in JVC. The community’s buzzing, your tower looks sharp in the marketing photos, and you’re ready to move in or hand it straight to a tenant. Then you notice the bathroom tap barely drips, one bedroom door won’t close flush, and there’s a hairline crack running along the balcony ceiling. None of it is catastrophic, but all of it should have been caught and fixed by the developer before handover, not after you’ve moved your furniture in. In this guide Why JVC needs its own approach The room-by-room checklist Studio vs 1BR vs 2–3BR DIY vs professional snagging Timeline and who to contact Common mistakes FAQs This is exactly why property snagging in JVC has become such a routine step for buyers in the area. JVC sees one of the highest volumes of new handovers anywhere in Dubai, and that volume means inspection quality varies a lot from tower to tower. A proper snagging checklist, done before you sign off on handover, is what protects you from inheriting someone else’s construction shortcuts. Why Does JVC Snagging Need Its Own Approach? JVC isn’t a single, uniform development. It’s a mix of low-rise and mid-rise towers built by dozens of different developers over more than a decade, which means build quality, finishing standards, and even the type of common defects can differ significantly from one cluster to the next. A checklist written for a Downtown high-rise or a Dubai Marina tower won’t necessarily flag the issues that show up repeatedly in JVC units: Uneven tiling in budget-tier finishes. Inconsistent paint coverage in high-volume handovers. AC units installed without proper drainage slope. Because so many JVC towers hand over apartments in batches, inspection teams on the developer side are often working through units quickly. That’s not a criticism of any one developer. It’s simply the reality of high-volume handovers, and it’s the reason an independent snagging inspection matters more here than in areas with slower, smaller handover batches. The 12-month DLP window Under Dubai’s Defects Liability Period (DLP) rules, developers are required to fix defects reported within 12 months of handover. But that window only works in your favour if you document issues properly and early, which is where a structured checklist comes in. The JVC Apartment Snagging Checklist Work through your unit room by room. Bring a torch, a spirit level or level app, and your phone camera. Photos and video are your evidence if you need to raise a dispute later. 1. Entryway and main door Does the main door align properly and close without forcing it? Do the lock, handle, and peephole all work smoothly? Check for gaps around the door frame that could let in dust or noise. 2. Flooring and tiling Look for cracked, chipped, or uneven tiles across every room. Tap tiles gently. A hollow sound can mean poor bonding underneath, a common issue in fast-turnaround handovers. Check skirting boards are flush and consistently finished. 3. Walls, ceilings, and paint Scan for uneven paint coverage, roller marks, or patchy touch-ups. Check ceilings and balcony soffits for hairline cracks or water staining. Look along wall corners for straightness. Bowed or uneven corners are a common JVC finishing issue. 4. Kitchen Open and close every cabinet and drawer, checking alignment and smooth operation. Test the sink, taps, and drainage for leaks or slow drainage. Confirm countertop seams are sealed properly and appliances (if included) power on. 5. Bathrooms and waterproofing Run all taps and the shower to check pressure and drainage speed. Look for silicone sealant gaps around the bathtub, shower, and sink. Poor sealing is one of the most common JVC snags and can lead to water damage if missed. Flush toilets and check for any leaks at the base. 6. Electrical and DEWA points Test every switch and socket with a phone charger or simple tester. Confirm smoke detectors are installed and appear functional. Check that the DEWA meter and distribution board are clearly labelled and accessible. 7. Air conditioning and ventilation Run the AC on cooling mode and check airflow from every vent. Look for water dripping from indoor units, a sign of poor drainage installation. Check for unusual noise or vibration when the unit is running. 8. Windows, doors, and balconies Open and close every window, checking seals for gaps or draughts. Inspect balcony railings for secure fixing and any visible rust or paint damage. Confirm balcony drainage isn’t blocked, especially before summer rains. 9. Common areas and building facilities Check that lifts, lobby finishes, and parking allocation match what was promised in your sales contract. Confirm shared amenities (pool, gym, garden) are operational if included in your purchase. 10. Documentation Record your unit number, inspection date, and every defect with photos. Note down the applicable warranty or DLP timeline for each issue category. Submit the report to your developer or facilities management within the DLP window. Rather have an engineer check all of this? book a JVC snagging inspection Studio vs 1BR vs 2–3BR: What Changes? Unit type Typical snag count Areas needing extra attention Studio 15–30 items Compact kitchen/bathroom finishing, single AC unit performance 1 Bedroom 25–45 items Additional bedroom door/window seals, balcony drainage 2–3 Bedroom 40–70+ items Multiple bathrooms, larger balcony/terrace areas, more electrical points Snag counts naturally scale with unit size, but finishing tier matters just as much. Two identically sized units in different JVC towers can show very different defect counts depending on the developer’s quality control during handover. What Are the Real Costs: DIY vs Professional Snagging in JVC? Doing your own inspection costs nothing but time, and this checklist will catch a lot of the obvious issues. But a professional snagging report goes further than a visual walkthrough. Inspectors use tools like thermal cameras and moisture meters to catch problems that aren’t visible, such as damp behind walls or inconsistent insulation. Professional snagging inspections
Plastering Defects Dubai: What to Look Out For
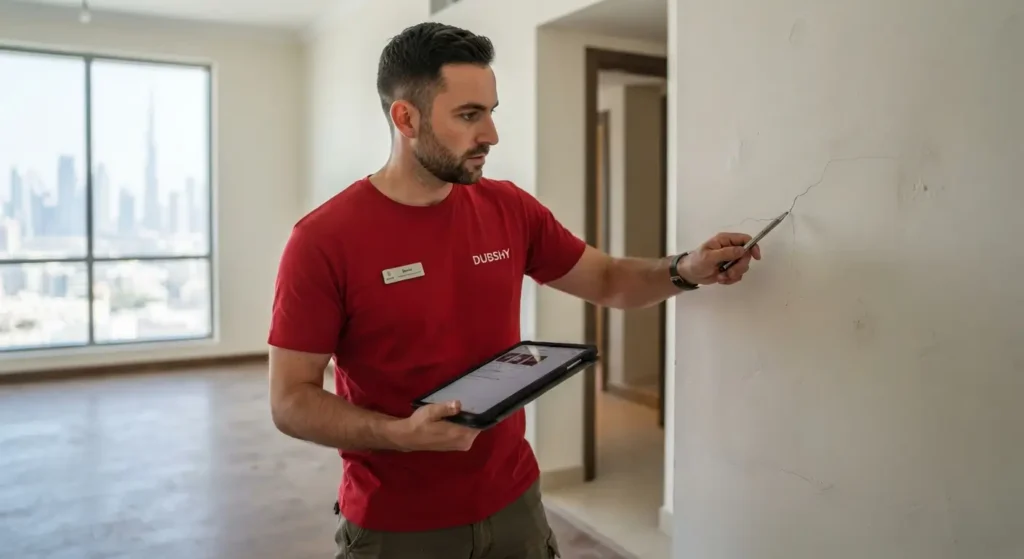
Plastering Defects Dubai: What to Look Out For 24 September 2026Guide5 min read Fresh paint has a way of hiding a lot. A wall can look perfectly smooth and evenly finished right after handover, and it’s only a few months later, once the building has settled and gone through a full temperature cycle, that the plastering underneath starts showing its actual condition. Plastering defects are some of the easiest issues to miss at handover, simply because most of them aren’t visible until the surface has had time to move. In this guide Why problems take time to show Common plastering defects Defects at a glance What a proper check involves Issues that only show up later What this costs Common mistakes FAQs Why Do Plastering Problems Take Time to Show? Plaster needs proper curing time, and in a fast-moving handover schedule, that curing sometimes gets cut short. A wall that was painted before the plaster fully dried underneath can look flawless on day one and start cracking, bubbling, or hollowing out months later. Dubai’s temperature swings between summer heat and AC-cooled interiors add extra stress on top of that, which is part of why plastering issues tend to surface gradually rather than all at once. Common Plastering Defects to Watch For Hairline and settlement cracks Some minor cracking is normal as a new building settles, and on its own it isn’t necessarily a red flag. What matters is documenting it early. A crack that’s recorded at handover gives you a clear baseline, so if it widens or multiplies later, you have proof it wasn’t there or was smaller when you moved in. Hollow or delaminated patches Similar to a hollow floor tile, plaster that hasn’t bonded properly to the wall underneath sounds different when tapped: a dull, hollow note instead of a solid one. This is invisible to the eye and only shows up through a methodical tap check across walls and ceilings, not a glance. Uneven surface and finish Bumps, ripples, or inconsistent texture across a wall usually point to rushed application or inconsistent skim coating. It’s often most visible in raking light, when sunlight or a lamp hits the wall at a low angle and shadows reveal texture that looked flat under normal lighting. Problems like this often only become fully visible once paint goes on, since paint highlights texture and unevenness that primer sometimes hides. Pairing a plastering check with a painting and decorating inspection catches both together. Bubbling or peeling near damp areas Plaster near bathrooms, kitchens, or external walls is more exposed to moisture, and bubbling or peeling in these zones is often a sign of trapped moisture underneath rather than a simple paint defect. Painting over it without addressing the underlying cause just delays the same problem resurfacing. Corner and edge cracking Internal corners and edges around door frames or windows are common stress points, since they’re where two different plaster sections meet. Cracking here is common enough that it’s worth checking specifically at every internal corner, not just the flat wall sections. Plastering Defects at a Glance Defect How it looks How it’s caught Hairline / settlement cracks Fine lines, often near corners Visual check across every wall Hollow patches Looks completely normal Tapping and listening for a hollow note Uneven finish Bumps or texture inconsistency Raking light inspection Bubbling near damp areas Blistering or peeling paint Moisture testing beneath the surface Corner / edge cracking Cracks at joints and frames Close inspection at every internal corner What Does a Proper Plastering Check Involve? Tapping. Walls and ceilings are tapped systematically to catch hollow or delaminated patches. Raking light. Every wall is checked under raking light to reveal texture and evenness issues invisible under normal lighting. Corners and edges. Internal corners and edges around doors and windows are inspected specifically. Moisture. Bathroom, kitchen, and external-facing walls are tested for moisture. Documentation. Every crack, patch, or uneven section is recorded by exact location and severity. A plastering and drylining inspection covers all of this systematically, rather than folding it into a general “walls look fine” note, because most of what actually matters here isn’t visible without deliberately checking for it. Want your walls checked properly? book a plastering inspection Which Plastering Issues Only Show Up Later? Some plastering problems don’t fully reveal themselves until the unit’s been lived in for a while, through a full summer of AC use and temperature cycling. Time a follow-up check Our 12-month DLP inspection guide covers why timing a follow-up check near the end of your DLP window matters, since issues that weren’t visible at handover sometimes surface only after that first full cycle. What Does a Plastering Check Cost? Plastering checks are typically included as part of a full apartment snagging inspection rather than priced separately, with full inspections starting from AED 499 depending on unit size. Units with more rooms, higher ceilings, or more external wall exposure naturally take a bit longer to check thoroughly. Common Mistakes Buyers Make Assuming fresh paint means the plaster underneath is sound. Paint can hide hollow patches and uneven finishes just as easily as it hides a poorly bonded coat. Only checking walls in normal lighting. Uneven texture often only becomes visible under raking light, which most buyers never think to check for during a standard walkthrough. Dismissing minor cracks without recording them. A hairline crack might be harmless, but without a dated baseline, it’s hard to prove later whether it’s gotten worse. Ignoring bubbling near bathrooms as “just a paint issue”. It’s often a moisture problem underneath, and painting over it without investigating just delays the real fix. FAQs About Plastering Defects in Dubai Are hairline cracks in new plastering always a problem? Not necessarily. Some minor settlement cracking is normal in a new building, but it’s worth documenting at handover so you have a clear baseline if it worsens. How can I tell if a wall has a hollow patch without special tools? Tap the wall gently
Flooring Defects Dubai Apartment: What Gets Missed
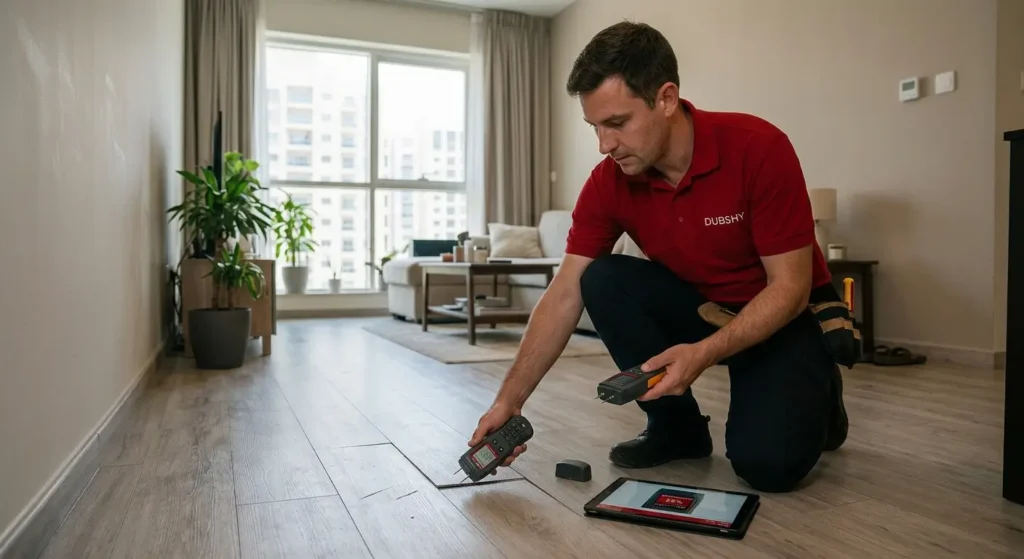
Flooring Defects in a Dubai Apartment: What Gets Missed 22 September 2026Guide5 min read A floor that looks flawless can still hide five distinct defect types: hollow tiles, level discrepancies, cracking, grout issues, and moisture beneath the surface. None of these show up on a visual walkthrough, which is exactly why they’re the most commonly missed defects at handover. You can walk across a floor a dozen times and never notice a hollow tile, a slight level dip, or moisture creeping in underneath. These are defects you have to actively test for, not just look at. In this guide Five defects that look fine Hollow tiles Level issues between rooms Cracking, chipping and edge damage Grout issues What a proper check involves When it’s a moisture problem What this costs Common mistakes FAQs Five Flooring Defects That Look Fine on the Surface Defect How it feels / looks How it’s caught Hollow tiles Looks completely normal from above Tapping every tile and listening for a hollow note Level discrepancies A barely-there lip between rooms Measured with a level tool, not felt underfoot Cracking / chipping Hairline cracks or damaged corners Visual check across every tile, not a sample Grout issues Uneven lines, gaps, early discolouration Close visual inspection room by room Hidden moisture Discolouration or tiles lifting slightly Moisture testing beneath the surface Why Are Hollow Tiles the Defect Nobody Sees Coming? A tile that isn’t properly bonded to the subfloor sounds different when tapped: a slightly hollow, drum-like note compared to the solid thud of a properly adhered tile. This happens when adhesive coverage was inconsistent during installation, and it’s invisible until either someone taps every tile methodically or, eventually, the tile actually cracks or lifts under weight or temperature change. A real example A buyer once walked us through his living room, proudly pointing out how the tiles “all matched perfectly.” They did, visually. Tapping across the floor told a different story: three tiles near the balcony door sounding distinctly hollow underneath. Once mapped and marked on the report, the developer’s contractor lifted and relaid all three inside a morning. Had that gone unnoticed, those same tiles would likely have cracked within a year or two of normal foot traffic. What About Level Issues Between Rooms? Floor transitions between rooms, especially where tile meets a different flooring material like wood or marble, are a common spot for level discrepancies. A level tolerances inspection measures this properly, since a difference of a few millimetres can be enough to create a trip hazard over time, even if it’s barely noticeable when walking normally at handover. These gaps also tend to widen slightly as a building settles in its first year, so what’s a minor lip at handover can become a more noticeable step down the line. Cracking, Chipping, and Edge Damage Hairline cracks and chipped corners are among the easier defects to spot, but they’re also easy to write off individually rather than tracked across the full floor. A single chipped tile near a doorway might look like normal wear-and-tear from moving furniture in, but the same pattern repeated across several tiles in the same room usually points to a batch quality issue or a subfloor problem rather than one-off damage. This is why a proper check goes tile by tile rather than sampling a handful and assuming the rest match. Why Are Grout Issues More Than Cosmetic? Uneven grout lines, small gaps, or early discolouration often get dismissed as purely aesthetic. But gaps in grout are also an entry point for moisture to reach the subfloor, which can eventually contribute to the exact hollow-tile and lifting issues covered above. Discolouration that appears unusually early, within months rather than years, can also be a sign the grout itself was mixed or applied incorrectly. What Does a Proper Flooring Check Involve? Tapping every tile. Done systematically, not sampling a few and assuming the rest match. Level transitions. Checked with proper measuring tools, not just by feel. Grout and edge work. Looked at closely, room by room. Moisture. Tested where discolouration or subtle lifting is present. Documentation. Each flagged tile or section recorded by exact location for the report. A floors and coverings inspection covers all of this, rather than a quick walk-through glance that only catches what’s visually obvious. The goal isn’t just to note that “the floor looks fine”. It’s to produce a dated record of exactly which tiles, transitions, or sections need attention before you sign off. Want every tile tap-tested before you sign off? book a flooring inspection When Is It Actually a Moisture Problem? Sometimes what looks like a flooring issue is actually a moisture problem showing through: discolouration, a slightly soft feel underfoot, or tiles that have started lifting for no obvious reason. Our moisture testing guide covers how that gets diagnosed properly, since treating it as a flooring defect alone just means the same problem resurfaces later, often in a worse state once the moisture has had more time to spread beneath the surface. What Does a Flooring Check Cost? Flooring checks are typically included as part of a full apartment snagging inspection rather than priced as a standalone service, with full inspections starting from AED 499 depending on unit size. Larger units with more rooms and floor transitions naturally take longer to tap-test thoroughly, which can affect overall inspection time more than it affects price. Common Mistakes Buyers Make Assuming a “perfect-looking” floor needs no further check. Hollow tiles, level dips, and hidden moisture are all invisible to a standing walkthrough. They only show up under systematic testing. Only checking the areas that seem high-traffic. Hollow tiles and level issues can show up anywhere, including corners and edges that rarely get walked on directly. Treating grout discolouration as purely cosmetic. Early discolouration can be an early sign of a moisture or application issue, not just an aesthetic flaw. Not documenting minor issues at handover. A slightly uneven transition or a faint hollow sound
Window Door Defects Dubai: Signs You Shouldn’t Ignore
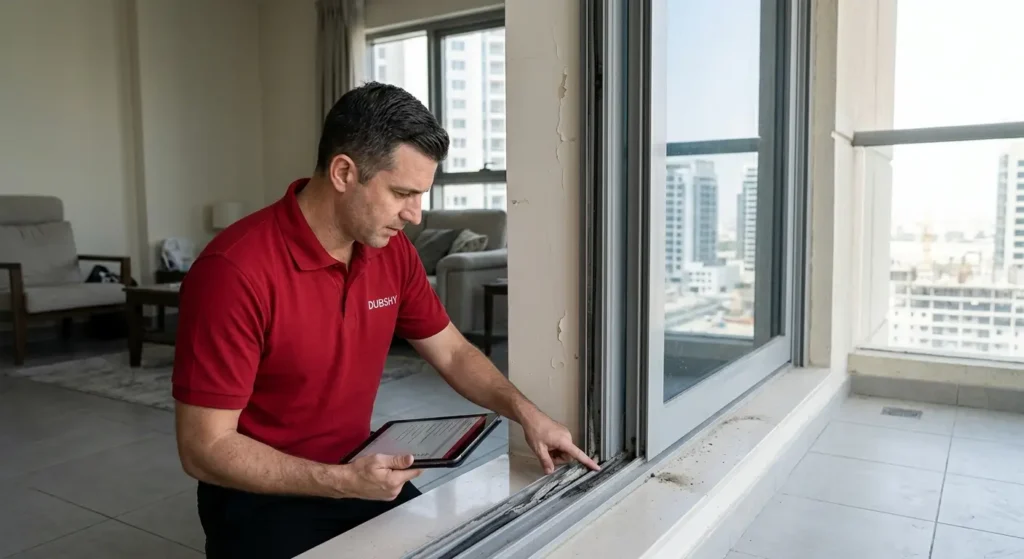
Window and Door Defects in Dubai: Signs You Shouldn’t Ignore 22 September 2026Guide5 min read You’ve done the walkthrough, signed off on the paint and the tiling, and everything looks sharp. Then a month in, a door starts sticking in the heat, or you notice a draught around a window frame that definitely wasn’t there during handover. Window and door defects are some of the most common, and most overlooked, issues in new Dubai apartments, partly because many of them don’t show up until the building has gone through a full temperature cycle. In this guide Why windows and doors are a weak point Common window defects Common door defects Windows vs doors How the inspection works What this costs Who to hire Common mistakes FAQs Why Are Windows and Doors a Common Weak Point? Dubai’s climate puts real stress on window and door installations. Frames expand and contract with heat, seals dry out faster under constant sun exposure, and rushed installation during handover crunches often means alignment gets checked once and never revisited. A proper windows and doors inspection catches these issues at the point they’re still the developer’s responsibility to fix, rather than months later when you’re footing the bill yourself. Common Window Defects to Watch For Seal and gasket failure One of the first places to be compromised in UAE heat is the rubber and silicone gasketing around window frames. Even if there is no visible damage, a seal that appears intact but is no longer flexible will not do its job of keeping out dust and moisture. Misaligned frames If a window isn’t perfectly square in its frame, gaps will show up, latching will be awkward, and it may whistle on windy days. This is normally an installation problem rather than a manufacturing one, which is why it needs to be identified before handover sign-off. Condensation between panes With double glazing, condensation on the outside of the unit is normal. Condensation between the panes means the seal on the glazing unit itself has failed. It can appear and disappear with changes in temperature, so it’s only visible under specific conditions. Common Door Defects to Watch For Sticking or dragging doors Sticking doors, particularly internal ones, may indicate that the frame has slightly moved or that the door was hung out of level. It’s a minor issue now, but it will get worse as the building settles further. Hardware misalignment In hurried construction, common problems include stiff handles, locks that don’t line up with their strike plates, and hinges that aren’t aligned properly. Test each door several times, as the problem can be intermittent and go unnoticed the first time. External door weatherproofing Balcony and entrance doors facing direct sun or exposed positions deal with more expansion and contraction than internal doors. Weather seals here wear out faster, and gaps at the threshold let dust in even when the door looks like it’s closing properly. Windows vs Doors: Where Defects Typically Show Up Factor Windows Doors Most common defect Seal degradation, misalignment Sticking, hardware misalignment When it becomes noticeable Often after the first heat cycle Often within weeks of handover Harder to spot on first look Condensation between panes Weatherproofing gaps at the threshold Worth extra attention South- and west-facing units Balcony and entrance doors Want every window and door tested properly? book a windows and doors inspection How Does the Inspection Actually Work? Visual checkEvery window and door frame is examined for alignment, gaps, and visible seal condition. Function testOpening, closing, and locking are tested multiple times, not just once. Thermal checkOur thermal camera inspection guide covers how thermal imaging picks up seal gaps and insulation issues that aren’t visible. External assessmentFor units with balcony doors or exposed frames, an external work inspection service checks weatherproofing from outside as well as in. Report deliveryFindings are logged by exact location and severity, and delivered within 24–48 hours. What Does a Window and Door Inspection Cost? Window and door inspections are typically bundled into a full apartment snagging inspection rather than priced separately, with full inspections starting from AED 499 depending on unit size. Dubshy scales pricing to the number of windows, doors, and balcony openings in the unit. Who to Hire: Questions Worth Asking Do they test every window and door multiple times, or just once during the walkthrough? Do they use thermal imaging to catch seal gaps that aren’t visible? Are external-facing doors and balconies inspected from both sides? How many checkpoints does their inspection actually cover? Is the report dated and detailed enough to use if you need to raise issues with the developer? Common Mistakes Buyers Make Only testing doors and windows once. A door can close fine on the first try and still drag intermittently, so it’s worth testing several times under slightly different conditions. Skipping the balcony door because it “looks new”. Weatherproofing issues on exposed doors often aren’t visible until the seal has gone through a full heat cycle. Assuming a stiff lock will loosen up on its own. Hardware misalignment tends to get worse, not better, especially if it’s tied to a shifted frame rather than just new hardware settling in. Not documenting minor issues at handover. A hairline gap or slightly stiff handle might seem too small to mention, but it’s worth having on record as a baseline in case it worsens later. FAQs About Window and Door Defects in Dubai Why do window and door defects often show up after handover rather than during it? Many issues only become obvious after the building has gone through a full heat cycle, since seals and frame alignment shift with temperature that a single walkthrough won’t capture. Are window and door defects covered under DLP? Defects reported within the Defects Liability Period are the developer’s responsibility to fix, which is why small gaps and sticking hardware are some of the cheapest issues to get sorted early. Check your sale agreement for the exact terms, and keep a dated record of
Carpentry Defects Dubai Villa: What Gets Overlooked
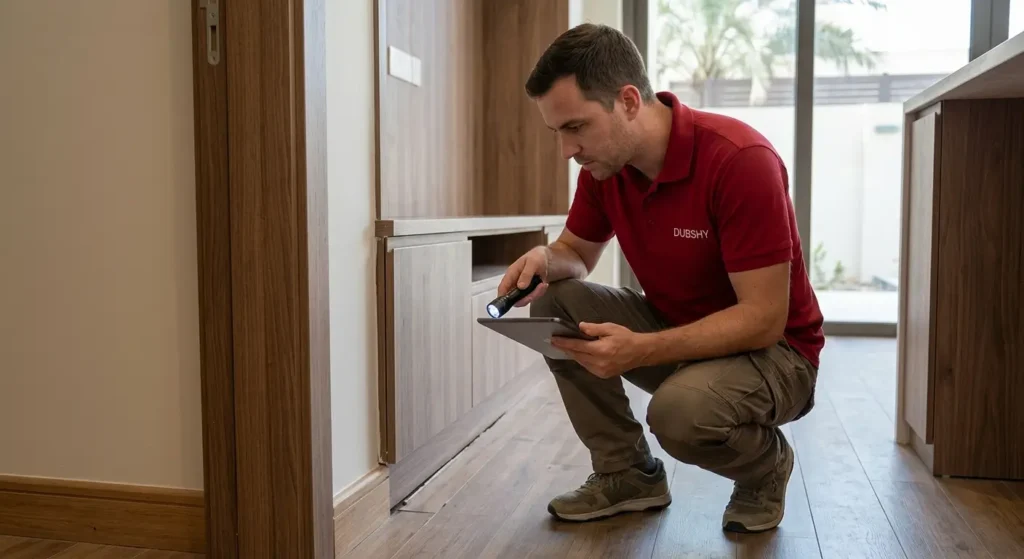
Carpentry Defects in a Dubai Villa: What Gets Overlooked 21 September 2026Guide4 min read Carpentry defects in new Dubai villas cluster around five areas: staircases, handrails, wardrobes, internal doors, and trim work. Most trace back to the same root cause: something installed against a surface that wasn’t quite level or square to begin with. The table below breaks down what to check and why it happens. In this guide Where carpentry issues show up Staircases What a proper check tests Wardrobes and doors Villa vs apartment scope FAQs Where Do Carpentry Issues Show Up Most? Area Common defect Root cause Staircases Creaking on specific steps, movement underfoot Subframe or noggins not properly fixed before treads went down Handrails & banisters Loose brackets that look solid until weight is applied Fixings not torqued correctly during installation Wardrobes & storage Doors don’t sit flush, drawers stick partway Cabinets installed against a floor that wasn’t perfectly level Internal doors Won’t close flush, swing open or shut on their own Frame slightly out of square, door not hung level Skirting & trim Gaps at the wall, mismatched mitred corners Rushed finishing, caulked over instead of properly fitted Why Do Staircases Take More Abuse Than People Realise? Wooden staircases in particular are prone to creaking, slight movement underfoot, and occasionally visible gaps where treads meet risers. It’s almost always because the subframe wasn’t fixed tightly enough during installation, or because the timber wasn’t given time to acclimatise to Dubai’s climate before being fitted. A real example A villa owner told us his staircase “just has character” because it creaked on three specific steps every time. Once we got underneath to look, a run of noggins between the stringers had never been fixed, just resting in place, so every step in that section flexed slightly under weight. A carpenter fixed it in under a day once it was documented. What Gets Tested in a Proper Carpentry Check? Doors and drawers. Every one is tested through its full range of motion, not just opened once. Staircases. Subframes are checked for movement, not just the visible treads. Handrails and banisters. Every one is shaken to confirm it’s actually secure. Skirting and trim. Checked room by room for gaps and mismatched corners. A carpentry and stairs inspection service covers all of this systematically, rather than a visual walkthrough that only catches what’s obviously wrong. Want your staircase and joinery checked properly? book a carpentry inspection Why Do Wardrobes and Doors Trace Back to the Same Root Cause? Doors that don’t sit flush, drawers that stick, hinges already showing wear within weeks of handover: a lot of this traces back to cabinets installed against walls or floors that weren’t perfectly level to begin with. A level tolerances inspection often explains why carpentry issues cluster in certain rooms, since a floor that’s slightly out of level in one bedroom throws off everything installed against it. Villa Versus Apartment Scope Villas simply have more of this to check than apartments: staircases, more built-in storage, more internal doors, and sometimes external timber elements too. Our villa vs apartment snagging guide breaks down how the scope actually differs between the two property types. FAQs About Carpentry Defects in a Dubai Villa Is a creaking staircase always a defect worth flagging? Usually, yes. A well-installed staircase shouldn’t creak consistently on the same steps, and while some minor sound is normal, a repeated creak in the same spot generally points to a subframe issue. How long does a full carpentry check take in a villa? The carpentry check is part of the full villa inspection, which typically takes 4–6 hours. Villas have more staircases, built-in storage, and internal doors to test than apartments, so this part takes longer than it would in a unit. Should carpentry issues be fixed before or after other snags? If a carpentry problem traces back to a floor or wall that isn’t level, it’s worth sorting that out first. Otherwise, doors and cabinets that are adjusted now can end up out of line again once the surface underneath is corrected. Does Dubshy check carpentry as part of a standard villa inspection? Staircases, handrails, wardrobes, internal doors, and trim work are all part of what’s checked in a villa, and findings are documented by exact location in the report. Confirm the scope when you book so you know exactly what’s covered. What’s the most common carpentry defect found in new villas? Doors and wardrobe units that don’t sit flush, and staircases that creak on specific steps, come up often. Most trace back to the same root cause: something installed against a surface that wasn’t level or square to begin with. Ready to Start Your Staircase and Joinery Inspection? A creaking stair or a sticking wardrobe door is usually a fixable installation issue worth catching before your DLP closes. If handover’s coming up, it’s worth arranging to get your staircase and joinery inspected so anything genuinely wrong gets flagged while the developer’s still responsible for it. book a carpentry inspection
Business Bay Snagging Checklist: Dubai Buyer Guide
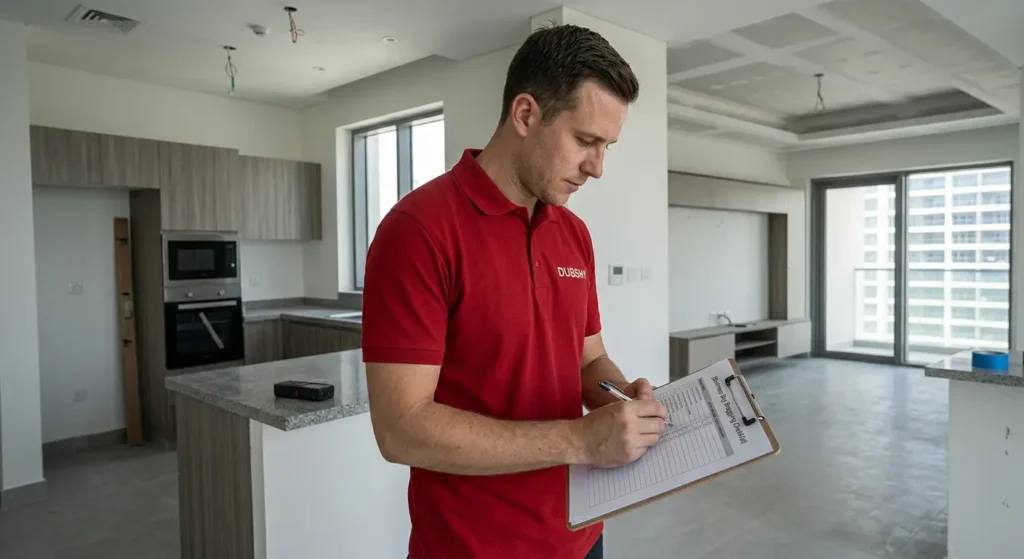
Business Bay Snagging Checklist: Dubai Buyer Guide 19 September 2026Checklist6 min read You’ve finally got the keys to your Business Bay apartment, and the view over the canal is everything you imagined when you signed the SPA. But before you start hanging curtains, that view is exactly why a Business Bay snagging checklist needs to look a little different from a standard handover check. Canal-front units carry a set of defects that inland apartments simply don’t deal with, and catching them now, while the developer is still on the hook, is a lot easier than catching them a year later. In this guide Why canal-front units snag differently What to get right first Full canal-front checklist What this costs How the inspection works Buying off-plan Who to hire Common mistakes FAQs Why Do Canal-Front Units Snag Differently? A regular apartment snagging list covers the basics: paint finish, tiling, doors, AC performance, electrical points. Canal-front units need all of that plus a second layer of attention around anything that touches water, humidity, or the building’s exposure to the canal environment. A proper property snagging in Business Bay inspection accounts for this specifically, rather than treating every unit like a standard inland apartment. This isn’t about the canal being “risky”. It’s simply a different set of physics than a landlocked tower faces, and a snagging inspection should be scoped accordingly. What Should You Get Right First? Balcony waterproofing and drainage Canal-front balconies take more exposure to moisture than a typical balcony, whether from splashback, condensation, or general humidity off the water. The floor should slope correctly toward the drainage outlet, not pool in a corner, and the waterproof membrane under the tiling should show no signs of bubbling, staining, or early cracking at the joints. Glass and sealant condition Floor-to-ceiling windows facing the canal are a signature feature of these units, but they’re also the largest sealant run in the apartment. Gaps, uneven bead lines, or sealant that’s already showing hairline separation from the frame are worth flagging immediately. This is where water finds its way in over time, long after the warranty conversation has gotten harder to have. Balustrade and railing corrosion Metal balustrades and railings facing open water are exposed to more humidity cycling than an inland unit. Check for early pitting, inconsistent coating, or loose fixings at the base. These are cheap fixes now and expensive replacements later. The Full Snagging Checklist for Canal-Front Apartments Balcony floor and drainage. Correct slope, no standing water, clear drainage outlets. Window and door sealants. Even application, no gaps, no early cracking. Balustrades and railings. No corrosion, secure fixings, smooth coating. Interior humidity signs. Damp patches near external walls, especially on lower floors. AC condensation drainage. Properly routed, no leaking near canal-facing rooms. Mould or mildew. Corners, behind wardrobes, under sinks on external walls. Structural cracks. Hairline settlement cracks vs cracks that suggest movement. Paint and finish near glass walls. Bubbling or peeling near window frames. Door and window operation. Smooth close and seal, no warping from humidity. View-facing glass clarity. Scratches, smears, or film defects on canal-facing panels. Each of these gets checked, photographed, and logged as part of a standard inspection. The goal is a professional snagging report you can hand to the developer, not a mental note you’ll forget by next week. Want a canal-front specialist check before you sign off? book a Business Bay inspection What Does Snagging Cost in Business Bay? Snagging inspection pricing in Dubai typically depends on unit size and the depth of the inspection. For a standard Business Bay apartment, expect a range of roughly AED 800–1,800 for a one- to two-bedroom unit, and higher for larger or penthouse layouts with multiple balconies and canal-facing walls. Dubshy inspections start from AED 499, with pricing scaled to unit size and scope. How Does the Inspection Process Work? BookingSchedule around your handover date, ideally before you sign off with the developer. On-site inspectionA certified inspector walks the full unit, canal-facing areas included, using thermal cameras and moisture meters where relevant. DocumentationEvery defect is photographed and logged against its exact location. Report deliveryA detailed report within 24–48 hours, organised by room and severity. Developer follow-upYou use the report as your reference when raising items with the developer before final sign-off. What If You’re Buying Off-Plan in This Area? A lot of Business Bay’s newer stock is still off-plan or recently handed over. Know the milestones Our off-plan property inspection guide covers what that process typically looks like and what to expect at each milestone before your final handover. Who to Hire: Questions Worth Asking Before booking any inspector, it’s worth confirming a few things upfront: Are they RERA and InterNACHI certified, or working to a recognised inspection standard? Do they use thermal imaging and moisture detection equipment, not just a visual walkthrough? How many checkpoints does their inspection actually cover? How fast is the report turnaround, and does it come with dated photo documentation? Do they have specific experience with canal-front or waterfront units? Dubshy is RERA- and InterNACHI-certified, checks 400+ points per inspection, and has completed 15,000+ inspections across Dubai, with reports delivered in 24–48 hours. Common Mistakes Buyers Make Skipping the balcony because it “looks fine”. Most canal-front waterproofing issues aren’t visible until months later. A moisture meter catches what your eyes won’t. Testing everything only once. Doors, windows, and drainage can pass a single test and still fail intermittently, so it’s worth checking under slightly different conditions where possible. Relying on the developer’s own snagging report. It’s a reasonable first pass, but it’s internal paperwork about their own work, not a neutral, dated record you can lean on if a dispute comes up later. Waiting until after handover sign-off. Once you’ve signed, your leverage on defects drops significantly. The inspection needs to happen before that point, not after. FAQs About the Business Bay Snagging Checklist Do canal-front apartments really need a different snagging approach than other units? Yes. The added exposure to humidity, water,
Villa Driveway Inspection Dubai: Essential Property Guide
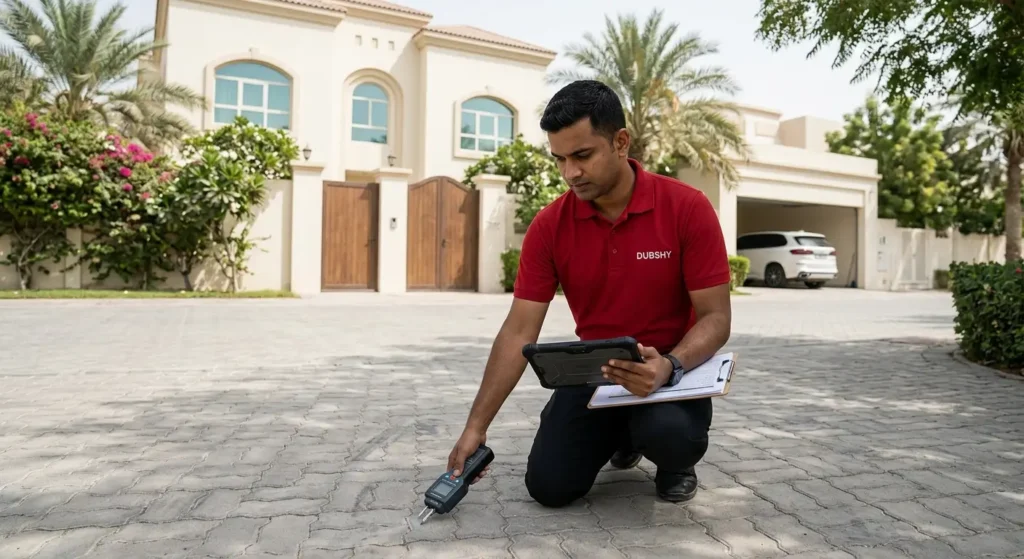
Villa Driveway Inspection Dubai: Essential Property Guide 18 September 2026Guide4 min read A villa driveway needs five specific checks before handover: slope and drainage, surface cracking, edge and border work, gate mechanisms, and whatever runs underground that you can’t see. Most buyers skip all five, assuming concrete or pavers don’t need inspecting. The table below covers what to check and why. In this guide Five things worth checking Slope and drainage Surface cracking and settlement Gate and access testing What goes underneath If you’re buying a townhouse FAQs Five Things Worth Checking Check area What to look for Why it matters Slope & drainage Run water and watch where it actually goes Wrong slope pushes water toward the house instead of away Surface cracking Hairline cracks, gaps between pavers, dips in level Points to ground settlement that can worsen over time Edge & border work Loose edging, gaps for weeds, uneven transitions Rushed in final construction stages; a trip hazard risk Gate mechanisms Test sensors and motor across multiple open-close cycles Intermittent faults are easy to miss on a single test Underground services Irrigation, drainage, electrical conduit Invisible once finished; symptoms show up elsewhere first Why Do Slope and Drainage Come First? A driveway needs a slight fall away from the garage and the house itself, pushing water toward the street or a drain rather than letting it pool near the building. Get that slope wrong, even slightly, and water collects exactly where you don’t want it. This is genuinely one of the most common issues we find, and it’s completely invisible until it rains. Testing it properly means running water directly onto the surface and actually watching where it goes. A proper driveway and garden inspection service does exactly this rather than relying on a visual guess. Surface Cracking and Settlement Hairline cracks in concrete or gaps opening between pavers usually point to settlement in the ground underneath. They’re worth documenting at handover so any progression later can be tracked against a known starting point. A real example A section near a garage entrance we looked at last year had settled just enough to create a small lip where two pours met. It was barely noticeable walking across, but enough to catch a wheel awkwardly. Gate and Access Testing Open and close the gate at least five times, not just once. Test the sensor by placing an object in its path mid-cycle. Listen for any straining sound from the motor. Check that alignment hasn’t shifted after repeated cycles. Want the driveway and gate tested properly? book a driveway inspection What Goes Underneath That You Can’t See? Irrigation lines, drainage pipes, and sometimes electrical conduit for gate motors or driveway lighting all typically run beneath or alongside a villa’s driveway. Problems here tend to surface as symptoms elsewhere: an oddly wet garden bed, or a gate that’s lost power. An external work inspection service checks the exterior systems as a whole rather than just the driveway surface in isolation. If You’re Buying a Townhouse Instead Townhouses often share driveway or parking arrangements with neighbouring units, which changes what’s actually your responsibility versus shared community upkeep. Our townhouse snagging guide covers that distinction in more detail. FAQs About Villa Driveway Inspection in Dubai How would I even know if drainage is a problem before it rains? Run a hose over the surface and watch where the water actually goes, rather than waiting for the first proper rainfall to find out. Are hairline cracks in a new driveway normal? Not necessarily a problem, but they usually point to some settlement in the ground underneath. Document them at handover so any progression later can be tracked against a known starting point. Should I test the gate myself before handover? Yes. Open and close it at least five times, test the sensor by placing an object in its path mid-cycle, listen for any straining from the motor, and check that alignment hasn’t shifted after repeated cycles. Intermittent faults are easy to miss on a single test. Does Dubshy check driveways as part of a standard villa inspection? Driveways, drainage, and gates fall under external works, which is reported as its own section of the villa snagging report. Confirm the scope when you book so you know exactly what your inspection covers. How long does a driveway and gate inspection usually take? It’s done as part of the full villa inspection, which typically takes 4–6 hours. Running water onto the surface and cycling the gate several times take a little extra time, but they’re what catch the issues a quick visual check misses. Ready to Start Your Villa Driveway Inspection? It looks like the last thing worth inspecting on a new villa, right up until drainage proves otherwise. If handover’s coming up, it’s worth arranging a driveway and garden inspection so drainage and surface issues get caught while they’re still the developer’s problem to fix. book a driveway inspection
Electrical Wiring Defects Dubai: Warning Signs to Spot
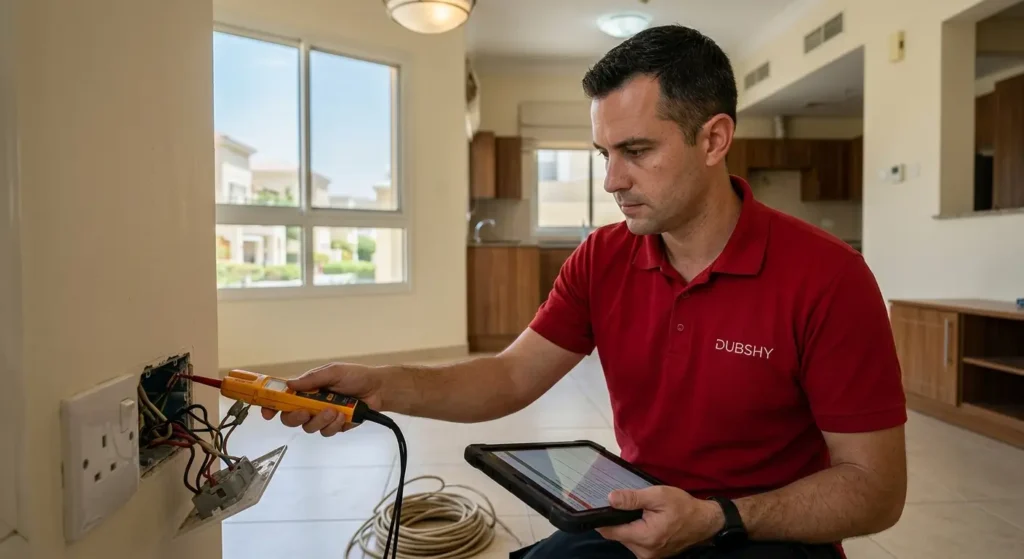
Electrical Wiring Defects Dubai: Warning Signs to Spot 17 September 2026Guide4 min read Five wiring defects account for most of what turns up in new-build Dubai electrical inspections: loose connections, overloaded circuits, incorrect earthing, dead or miswired sockets, and lighting wired to the wrong switch. The table below shows the symptom to watch for and the likely cause behind each one. In this guide The five most common wiring defects Loose connections Earthing issues What gets checked Why this matters more in villas Where paintwork hides problems FAQs The Five Most Common Wiring Defects Defect Symptom Likely cause Loose connections Flickering, intermittent power, warm switch plates Terminated but not properly tightened under time pressure Overloaded circuits Breakers tripping under normal use Circuit undersized for how people actually live with modern appliances Incorrect earthing Passes a basic plug tester but isn’t to spec Needs proper testing equipment, not just a socket tester, to catch Dead or miswired sockets No power, or live/neutral reversed Goes unnoticed if behind furniture or in a rarely used room Wrong switch wiring Two-way switch only works from one end Common in villas with multiple switch banks Why Do Loose Connections Top the List? Wiring installed under time pressure, which is common on a tight handover deadline, sometimes ends up with connections that are technically made but not properly tightened. These often work fine initially and only start causing visible problems after the connection has had time to loosen further through normal use and thermal expansion. A real example A villa owner once described his flickering hallway light as “just one of those things new houses do.” It wasn’t. The distribution board sat almost thirty metres from the fixture, run through two junction boxes along the way. It took opening both and testing wire tension directly to find the loose neutral connection causing it. Earthing Issues That Test Fine but Aren’t Earthing is the defect most likely to slip through a quick check. A socket can pass a basic plug-in tester and still not be earthed to specification, because that kind of tester only confirms the basics. Catching it properly takes dedicated testing equipment, not just a socket tester. It matters because incorrect earthing is a genuine safety concern, not just an inconvenience, which is why it’s worth verifying before you sign off rather than assuming a working socket is a safe one. What Gets Checked in a Proper Electrical Inspection? Sockets. Every socket is tested for power and correct polarity, not just visually inspected. Switches and lights. Every switch and light circuit is operated to confirm it controls the right fixture. Breaker panel. Checked for correct labelling and load balancing. Earthing. Verified with proper testing equipment. Want the wiring tested with proper equipment? book an electrical inspection Why Does This Matter More in Villas? Villas have more circuits, more distance between the distribution board and individual rooms, and often external wiring for garden lighting or driveway gates that towers simply don’t have. More wiring means more places for something to have gone slightly wrong during installation. Where Does Painting Work Sometimes Hide the Problem? Switch plates and socket covers get painted over during the final finishing stage. A painting and decorating inspection sometimes flags cases where paint has actually gotten into a switch mechanism, which isn’t just cosmetic. It can affect how the fitting functions. If you want to see how electrical issues rank against everything else commonly found in new Dubai properties, our common defects in new Dubai property guide covers the full range. FAQs About Electrical Wiring Defects in Dubai Are wiring defects dangerous or usually just annoying? It varies. A miswired lighting circuit is mostly an inconvenience, while incorrect earthing or an overloaded circuit is a genuine safety concern that can lead to shocks or fire risk. Can I test my own wiring with a plug-in tester? A plug-in tester is useful for spotting dead sockets and reversed polarity. But it can’t confirm earthing is to specification, because incorrect earthing can pass a basic plug tester. That part needs proper testing equipment. Do villas really have more wiring issues than apartments? Villas have more to go wrong: more circuits, longer distances between the distribution board and individual rooms, and often external wiring for garden lighting or driveway gates. More wiring means more places for a small installation mistake to hide. Does Dubshy check electrical systems in both villas and apartments? Electrical checks (sockets, switches and lights, the breaker panel, and earthing) are part of a snagging inspection for both property types. Villas simply have more circuits and external wiring to cover, so confirm the scope when you book. What’s the most common electrical defect found during snagging inspections in Dubai? Loose connections top the list. Wiring installed under handover time pressure can be connected but not properly tightened, and it often only causes problems once the connection has loosened through normal use and thermal expansion. Ready to Start Your Electrical Inspection? Wiring defects don’t always announce themselves right away, and dismissing one as normal can mean living with a real fault. If handover’s coming up, it’s worth arranging an electrical inspection so anything wrong gets caught while it’s still the developer’s responsibility to fix. book an electrical inspection