
Mould and Mildew Inspection: Dubai Apartment Guide
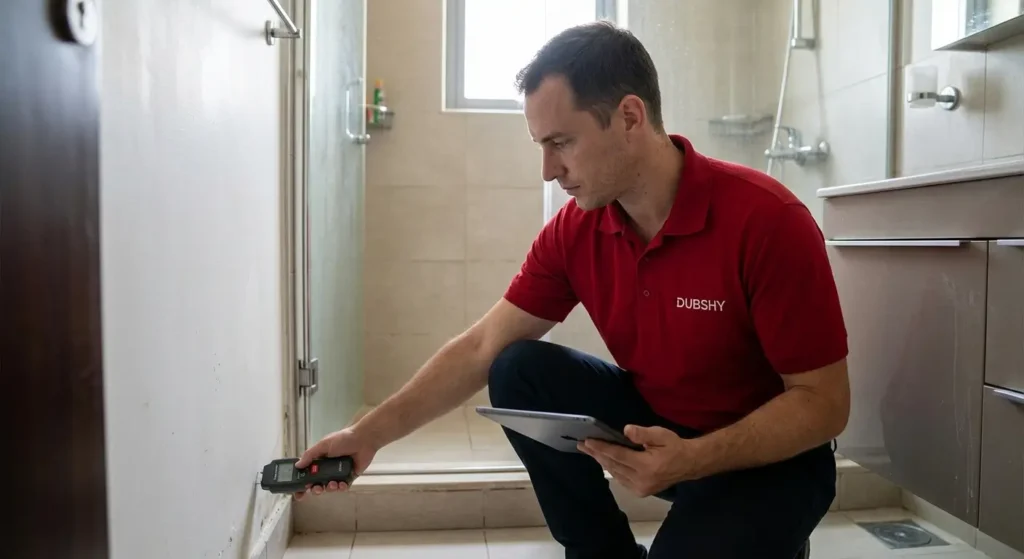
Snagging Engineer Dubai: What They Do and Check

Snagging Engineer Dubai: What They Do and Check Updated 8 October 2026Guide7 min read Job titles in this industry are a mess. Snagging engineer, snagging inspector, property inspector, building surveyor, handover consultant. Some of those mean something specific. Some are marketing. The distinction matters because you’re about to hand someone three hours alone in your property and then rely on their document to make a developer spend money. What sits behind the title decides whether that document holds up. In this guide What a snagging engineer is What they do on site Equipment to expect Qualifications to look for When to book What they charge Vs a building surveyor What the report should contain What happens after FAQs Conclusion Here’s what a snagging engineer Dubai owners hire should actually be doing on site, what to check before you book one, and where the real differences between providers show up. What Is a Snagging Engineer? A snagging engineer is a qualified construction or building services professional who inspects newly built property for defects and produces a documented schedule the developer can be held to. The engineering part matters: they’re assessing whether work meets a standard, not just noting what looks untidy. That’s the difference from a general property inspector. An inspector can tell you a floor looks uneven. An engineer measures the deviation, states the tolerance it should have met, and records the reading in a form that survives being challenged. What Does a Snagging Engineer Actually Do on Site? They run a systematic technical survey of the whole property using measuring and diagnostic equipment, then document every finding with a location, a severity grade and photographic evidence. A typical apartment visit runs two to three hours and a villa four to six. Building fabric. Floors and walls checked for level and flatness, tiles tapped for hollow beds, plaster and paint reviewed under raking light for patches and roller marks. Mechanical systems. Temperature split measured at each fan coil unit, condensate drains checked for fall, ceiling void pipework checked for insulation and access. Electrical systems. Socket polarity and earth continuity tested throughout, RCD tripped and reset, distribution board labelling verified. Water and drainage. Wet areas flood tested, falls checked against the drain, waste connections examined under load, mixers checked for reversed supply. External envelope. Window and door perimeter seals, weep holes, balcony falls, and on villas the roof, elevations, boundary and plot drainage. Documentation. Every item written up with a reference, location, trade, severity, required action and indexed photographs. What Equipment Should They Bring? Equipment is the fastest way to tell a technical survey from a walkthrough. A properly equipped engineer arrives with, at minimum: Thermal imaging camera for hidden moisture, insulation gaps and pipework tracing Moisture meter for readings behind wet areas and below windows Socket tester and RCD tester for electrical safety checks Laser level and straightedge for floor and wall tolerances Tapping rod for hollow tile detection across large floor areas Thermometer or thermal probe for measuring air conditioning performance If nobody can tell you what’s coming in the bag, you’re buying a visual walk with photographs. That’s a legitimate service at a lower price, but it isn’t the same thing and it won’t find the defects that cost the most. What Qualifications Should You Look For? Look for a construction background rather than a property background: civil engineering, building services, architecture or a recognised surveying qualification, plus real site experience in the UAE. UAE experience matters more than people expect. Dubai construction has its own recurring failure patterns driven by climate and build speed. Chilled water pipework sweating in ceiling voids, screed falls that don’t reach the drain, waterproofing laps cut around AC penetrations. Someone who has walked hundreds of local handovers spots those in seconds. Someone applying a European snagging checklist will not, and that local pattern recognition is most of what you’re paying a snagging engineer Dubai side to bring. Ask who is actually attending, not who runs the company. Then check their name appears on the report. Our about us page sets out the backgrounds of the engineers who attend, because we think you’re entitled to know that before you book. Want to know who would attend your inspection? talk to our team When Should You Book a Snagging Engineer Dubai Owners Rely On? Twice, ideally. Once in the days after key collection while the developer’s obligation is at its strongest, and again around month nine or ten of the defects liability period before the one-year window closes. The second visit exists because a property has to live through one Dubai summer and one wet season before its real defects surface. Air conditioning reveals itself under August load. Waterproofing reveals itself in February. A handover survey physically cannot catch either of those. Most owners book the first and skip the second, which is why so many end up paying for repairs that would have been free eight weeks earlier. How Much Does a Snagging Engineer Dubai Charge? Most Dubai inspections run between AED 1,500 and AED 5,000 depending on property type and size, with apartments at the lower end and villas at the top. Some providers price per square foot instead, typically around AED 0.50 to 1.50 per sq ft. The spread reflects scope rather than margin. A quote well below market usually means a visual walkthrough with no thermal imaging, no moisture testing and no electrical testing. That’s a different service, not a discount on the same one. Ask what’s included before you compare numbers. Re-inspection visits, travel outside Dubai and VAT are commonly quoted separately, and any of them can move an agreed figure by several hundred dirhams. How Is a Snagging Engineer Different From a Building Surveyor? Scope and purpose. A building surveyor typically assesses overall condition and value-relevant issues on an existing property, often for a purchase decision. A snagging engineer assesses a new build against workmanship standards, for the purpose of getting defects rectified free during the defects
Post-Handover 12-Month DLP Inspection Dubai Guide

Post-Handover 12-Month DLP Inspection Dubai Guide Updated 8 October 2026Guide7 min read Almost everyone snags a handover. Hardly anyone snags again before the year is up, and that second visit is usually the more valuable of the two. The reason is simple. A property has to live through one Dubai summer and one wet season before its real defects surface. Handover day tells you about workmanship. Month ten tells you about performance. In this guide What it is When to book What a year of weather reveals Who pays for repairs Vs a handover inspection How to submit the findings If it’s called out of warranty FAQs Conclusion A 12-month DLP inspection is the survey you commission near the end of your defects liability period, while the developer is still obliged to fix what it finds. Leave it too late and the same repairs become your own cost. What Is a 12-Month DLP Inspection? It’s a full independent survey carried out in the closing months of the one-year defects liability period, producing a documented list you submit before the window shuts. It’s not a repeat of the handover snag list. It’s a check on how the building has performed since. The one-year period covers general workmanship and MEP systems. Structural elements sit under a separate ten-year liability through Article 880 of the UAE Civil Code. Our DLP inspection page breaks down which defects fall under which layer, because developers rely on that distinction when they push back. When Should You Book It? Month nine or ten, not month twelve. Submitting on the final day achieves nothing if the developer needs six weeks to schedule a contractor, so you want the list logged and acknowledged with real time still on the clock. Work backwards from your expiry date. Allow two days for the report, a week for submission and acknowledgement, and four to eight weeks for rectification and a re-check. That puts the inspection at roughly month nine. One trap worth flagging The period usually runs from the building’s completion certificate date rather than your key collection, so if you took handover three months after completion, your month nine is earlier than you think. What Does a Year of Dubai Weather Actually Reveal? Heat exposes the mechanical faults and rain exposes the waterproofing ones. Neither is visible on a handover walkthrough, which is why this inspection finds a different category of defect. What summer brings out Under full August load, an air conditioning system that seemed fine in March starts showing its problems. Condensate drains laid with insufficient fall back up and stain ceilings. Uninsulated chilled water pipework in ceiling voids sweats and drips. Fan coil units that were never properly commissioned run continuously without reaching setpoint, and the electricity bill tells the story before the ceiling does. What the wet season brings out A few days of real rain finds every drainage shortcut in the building. Balcony falls running back toward the threshold. Weep holes blocked with mortar during installation. Roof outlets choked with construction debris. Missing drip grooves under window sills, which show up as render staining down the elevation. What else appears in the first year? Movement and shrinkage account for most of the rest. Materials settle, joints open, and sealants shrink back as they cure through a full temperature cycle: Hairline cracks at wall and column junctions that weren’t there at handover Silicone at baths, trays and worktops that has shrunk and split Grout failing around floor drains and in shower trays Doors binding or dropping after frames moved with daily use Tiles that were hollow at handover now audibly loose or cracked Timber joinery and skirting opening at mitres Approaching your first anniversary? book a dlp inspection Who Pays for the Repairs? The developer pays, provided the defect falls inside the one-year period and you submitted it before expiry. That’s the whole point of the exercise, and it’s why timing matters here more than thoroughness. The exclusions are worth knowing. Normal wear and tear is yours. So is damage caused by your own fit-out contractor, anything you’ve modified, and cosmetic marks that appeared once furniture went in. Developers reject items on those grounds routinely, which is why a dated report from month nine carries far more weight than a description typed out in month twelve. How Does It Differ From a Handover Inspection? Same equipment, different focus. A handover survey documents construction quality on day one. A 12-month DLP inspection tests how the property has behaved since, with particular attention to anything involving water, air conditioning and movement. It also works from a different starting point. If you have your original snag list, a good inspector checks whether previously closed items were genuinely fixed or simply marked as done, which is a common and expensive gap. Our property handover inspection page covers what the first survey should have captured, and the second one verifies it. How Do You Submit the Findings? Submit through the developer’s official channel in writing, with the report attached and the critical items listed by reference number in the covering email. Ask for a rectification schedule with dates rather than an acknowledgement. Confirm your expiry dateGet the building completion certificate date from the developer in writing before you submit anything. Lead with severityOpen the email with the critical and major items. Developers triage on the first paragraph, not on page 27. Keep the referenceSave the submission number, the date and the original photographs. All three matter if the item is disputed later. Separate old from newFlag any item carried over from your handover list, because a defect raised twice and never fixed carries more weight. Re-check the workVerify rectification yourself rather than accepting a status change in the developer’s system. What If the Developer Says It’s Out of Warranty? Ask them to state the date they’re working to and the clause they’re relying on. Most rejections on timing grounds come down to a disagreement about when the period started, and that’s
Pre-Handover Inspection Dubai: What It Catches

Pre-Handover Inspection Dubai: What It Catches Updated 8 October 2026Guide7 min read There’s a lot of confusion around this term, and most of it comes from UK property advice being applied to Dubai. In the UK, buyers often walk a new build before completion. In Dubai, that access usually doesn’t exist. So when someone asks about a pre-handover inspection Dubai developers will allow, the honest answer needs a bit of nuance. Sometimes it’s possible. Often it isn’t, and what people actually mean is an inspection at the handover appointment itself, before they sign. In this guide What it is Is it possible in Dubai What it catches Vs a handover inspection If it finds serious defects Off-plan purchases How to prepare If the developer says out of warranty FAQs Conclusion Here’s what’s realistic, what each option catches, and how to get the most out of whichever one your developer offers. What Is a Pre-Handover Inspection? A pre-handover inspection is an independent survey of a completed property carried out before you formally accept it and sign the unit acceptance documents. The aim is to have a documented defect list in hand at the moment your leverage is strongest, rather than three weeks later. That’s the principle. The practice in Dubai depends entirely on whether your developer grants access before key collection, and most of the large ones don’t. Can You Inspect a Property Before Handover in Dubai? Sometimes, but it isn’t standard. Access before the official handover appointment is at the developer’s discretion, and the answer is usually no for high-volume apartment towers where slots run back to back. Where it does happen, it tends to be one of three situations. Some developers run a pre-handover viewing or orientation appointment a week or two before key collection. Some will allow access on request for a large villa or a premium unit. And a few buyers negotiate it into the closing arrangements when the final instalment is being settled. Ask the question in writing to your handover coordinator and ask early. A polite request four weeks out gets a different answer to one made two days before your slot. What Does a Pre-Handover Inspection Catch? A pre-handover inspection Dubai buyers manage to secure catches the same construction defects a handover survey would, but earlier, so rectification can start before you’ve taken responsibility for the unit. The high-value finds are consistent: Condensate drains laid with no fall, and uninsulated pipework in ceiling voids Shower and balcony floors that pond instead of draining Hollow floor tiles across corridors, thresholds and stair landings Blocked weep holes in sliding door tracks Incomplete perimeter mastic around window and door frames Sockets with reversed polarity or no earth continuity What it won’t catch is anything seasonal. Waterproofing failures appear after rain and AC problems appear under summer load, so neither survey removes the need for a second look later in the defects liability period. The catch: utilities A property without DEWA connected can’t be fully tested. No power means no air conditioning check, no electrical testing and no proper drainage test. Early access without utilities gets you a visual survey rather than a full inspection. How Is It Different From a Handover Inspection? Timing and leverage, mostly. A pre-handover inspection Dubai owners arrange happens before they sign. A handover inspection happens in the days immediately after key collection, which is when the great majority of Dubai surveys are actually carried out. In practical terms the second option loses you very little. Signing the acceptance form doesn’t waive your defect rights, and the defects liability period runs from the building’s completion date either way. Our page on handover inspection in Dubai covers that sequence in full, including what the acceptance paperwork does and doesn’t commit you to. Where it genuinely wins is on incomplete works. Finding an unfinished pool, missing landscaping or an uncommissioned booster pump before you sign is a stronger position than raising it afterwards, because incomplete and defective works follow different routes. Want the inspection timed around your handover slot? talk to our team What If the Inspection Finds Serious Defects? Serious findings before signing give you options that disappear afterwards. The useful move isn’t refusing handover, which rarely helps and can carry payment consequences. It’s getting the item formally recorded before you accept the unit: written into the handover documentation rather than only emailed, with a rectification date rather than an acknowledgement, and the inspector’s report as the reference both sides work from. A pre-handover inspection Dubai buyers commission for a villa often pays for itself on a single item. An uncommissioned booster pump, a roof outlet choked with debris, or landscaping graded back toward the house are all far easier to resolve as conditions of acceptance than as complaints raised afterwards. What About Off-Plan Purchases Still Under Construction? Inspections during construction generally aren’t available to individual buyers. Site access during the build is controlled by the contractor and the developer’s project team for safety and insurance reasons. What you can do while off-plan is track progress through the DLD’s project reporting and prepare properly for handover. Our guide to off-plan property inspection in Dubai sets out what to line up in the months before completion so you’re not scrambling when the notice lands. How Do You Prepare for a Pre-Handover Inspection? Get the request in early and get the utilities live, because those two things decide how much a pre-handover inspection Dubai actually delivers. Six steps in order: Ask in writingEmail your handover coordinator four to six weeks out to ask whether early access is available for your unit. Confirm utilitiesAsk specifically whether power and water will be live during the visit, because that changes the scope of what can be tested. Book around the answerIf access is granted, book for that window. If not, book for the day after key collection. Get the completion dateAsk for the building completion certificate date in writing. That’s when your one-year defects liability clock started. Prepare
Apartment Handover Checklist Dubai (Free PDF Download)

Apartment Handover Checklist Dubai (Free PDF Download) Updated 8 October 2026ChecklistFree PDF7 min read Handover appointments in Dubai towers run to a schedule. You get a slot, someone walks you round, you sign, and the next owner is already waiting in the lobby. Forty minutes, start to finish. That’s not enough time to find anything meaningful, which is why so many owners discover the real problems in month three. A stain appearing on a bedroom ceiling. A balcony door that won’t seal. An AC unit cooling one room properly and the other not at all. In this guide What to sort before the appointment The room-by-room list Apartment vs villa handover What most buyers miss Submitting your snag list FAQs Conclusion This apartment handover checklist Dubai owners can work from covers what to sort beforehand, what to check room by room, and the items that get missed most often in apartment stock specifically. There’s a printable version at the end. Prefer a printable copy? download free pdf checklist What Should You Sort Before the Handover Appointment? Get your utilities live and your paperwork ready before the date, because an apartment with no power and no chilled water can’t be properly checked. Five things to clear: DEWA activation. Set up your name using the premise number from your handover documents. Nothing electrical or plumbing-related can be tested without it. District cooling account. Empower or Emicool depending on the tower. Note the BTU meter reading on the day and keep a photo of it. Service charges. Community management usually asks for several months in advance, billed through Mollak, before releasing a slot. Documents. Passport or Emirates ID, the sale and purchase agreement, and proof of final payment. Bring a power of attorney if someone attends for you. Run the AC. If you can get access ahead of the inspection, leave the air conditioning running for two hours. Ten minutes of cold air proves nothing. Apartment Handover Checklist Dubai: The Room-by-Room List Work in a fixed order and finish each room before moving on. Skipping between rooms is how items get missed. Front door, hallway and fire protection Your front door is a fire door and it’s the item almost nobody checks. It should close and latch on its own from any position without being pushed. Look for the certification label on the hinge edge, check the intumescent strip is continuous in the frame rebate, and check the gap around the leaf is even. Then test the video intercom actually rings and shows the right lobby camera. Living areas and bedrooms Tap across the floor tiles listening for a hollow sound, check lippage between tiles and gaps at the skirting, and hold a torch flat against each wall so raking light picks up roller marks and patch repairs. Open and close every internal door and check none of them drift shut on their own, which points to a frame out of plumb. Kitchen Open every cabinet door and drawer to check alignment and soft-close. Fill the sink and release it, watching underneath for movement at the waste connection. Then confirm the extractor is ducted into a riser rather than blowing into the ceiling void, which is more common in apartment fit-outs than it should be. Bathrooms Pour water across each shower floor and watch where it goes. If it sits anywhere off the drain, the fall is wrong and that’s a screed job. Check the silicone at bath, tray and worktop junctions, run every mixer to confirm hot and cold aren’t reversed, and flush each WC while checking the pan connector for movement. Balcony and windows Check the weep holes in the bottom track of sliding doors. Blocked weep holes are why water sits against the threshold in February and works under the flooring. On the balcony itself, pour water and check it runs to the outlet rather than back toward the door. Push firmly on glass balustrade fixings, and look for condensation trapped between the panes of any sealed unit. AC, ceiling voids and electrics Measure the temperature difference at each fan coil unit after a proper run, and check there’s an access hatch big enough to service it. Look along the condensate drain for fall and insulation. On the electrical side, test each socket for polarity and earth, trip and reset the RCD, confirm the distribution board is labelled correctly, and check the smoke detector responds. Before you leave Count what you’re being handed. Keys, access cards and fobs, the parking bay number and how it’s accessed, the storage room key if you have one, and the appliance manuals and warranty cards. Missing fobs and unassigned bays take weeks to resolve once the handover team has moved on to the next building. What Makes an Apartment Handover Different From a Villa? Roughly a third of what affects your apartment isn’t yours to snag. Risers, shared corridors, the lobby, lifts, the car park and the building envelope belong to the owners association, and defects there follow a separate route and a separate timeline. That split matters when problems overlap. A damp patch on your ceiling often originates in a common shaft, and you’ll get passed between the developer and the building manager unless you log it with both on the same day. Our guide to handover inspection in Dubai covers how the two tracks work and which one each defect belongs to. What Do Most Buyers Miss in an Apartment Handover? Every apartment handover checklist Dubai buyers find online covers the obvious rooms. These five rarely appear on any of them, and we log them in towers across Business Bay, JVC, Dubai Marina and Creek Harbour week after week: The front fire door not self-closing, or missing its intumescent seal The BTU meter reading not recorded, so the first cooling bill includes construction usage No access hatch to the fan coil unit, or one too small to service it through The kitchen extractor terminating in the ceiling void instead of a
Snagging Report Cost Breakdown: Prices & What’s Included

Snagging Report Cost Breakdown: Prices & What’s Included Updated 8 October 2026Pricing guide7 min read Ask three Dubai snagging companies to quote the same two-bedroom apartment and you’ll get AED 900, AED 1,700 and AED 3,200. Same unit, same day, same brief. That spread confuses people more than any other part of the process. It isn’t random. The gap between those numbers is scope, and scope is invisible until you compare what each quote includes. Some of those inspections involve a thermal camera and a moisture meter. Some involve a phone and a clipboard. In this guide What a report costs in 2026 Where the money goes Per property or per sq ft Why quotes differ so much What should be included One inspection or two Is it worth the cost FAQs Conclusion This snagging report cost breakdown 2026 splits the fee into its parts so you can tell which one you’re being quoted for, and work out whether the cheaper number is a saving or a shortcut. What Does a Snagging Report Cost in Dubai in 2026? Most Dubai snagging inspections fall between AED 1,500 and AED 5,000, with apartments at the lower end and villas at the top. Providers price either as a flat fee by property type or per square foot of built-up area. Dubai snagging price ranges, 2026 Property Typical price Studio / 1-bed apartment AED 800 to 2,500 2 to 3-bed apartment AED 1,300 to 3,500 Townhouse AED 1,800 to 3,500 Villa, 3-bed and above AED 2,000 to 5,000 and up Per square foot model AED 0.50 to 1.50 per sq ft VAT 5%, usually added on top Those are market ranges rather than any one company’s rates. The overlap between bands is where scope differences live, which is the part worth understanding before you compare quotes. Snagging Report Cost Breakdown 2026: Where the Money Goes Roughly half of what you pay covers time, split between the site visit and writing the report. The rest covers equipment, coordination, travel and any return visit. What the fee actually buys Cost element What it covers Time on site Two to three hours for an apartment, four to six or more for a villa. The biggest single driver of price. Equipment Thermal camera, moisture meter, socket and RCD tester, laser level, tapping rod. Quotes at the bottom of the market often skip most of this. Report production Indexing photographs, grading severity and writing the schedule. Frequently takes as long as the inspection itself. Coordination Booking around your handover slot, chasing access, liaising with the developer’s handover team. Travel Distance from the inspector’s base. Out-of-emirate and remote community visits usually carry a surcharge. Re-inspection A second visit to verify rectification. Sometimes bundled, more often quoted separately. Report production is the line most buyers don’t expect. A 180-item schedule with indexed photographs, severity grades and specified actions takes hours of desk work after the inspector has left. A report that arrives an hour after the visit hasn’t had that work done to it. Is Snagging Priced Per Property or Per Square Foot? Both models are used. Flat fees are standard for studios and apartments where the scope is predictable, and per square foot pricing at roughly AED 0.50 to 1.50 per sq ft is more common for villas, townhouses and anything unusually large. Per square foot suits large properties because it scales honestly with the work involved. A 4,000 sq ft villa with a pool, a plant room and 200 metres of boundary wall genuinely takes three times as long as a 1,200 sq ft apartment. A flat villa fee either overcharges the small plots or undercharges the big ones. Why Is One Quote AED 900 and Another AED 3,000? The difference is almost always equipment, hours and report depth. A budget quote typically means a visual walkthrough with a phone camera, no thermal imaging, no moisture testing, no electrical testing and a photo-dump PDF with no defect schedule. None of that is fraudulent. It’s a different product. The problem is that the two get sold under the same word, so buyers compare on price alone and assume they’re choosing between identical services. The check that separates them is simple. Ask what equipment comes to site, how many hours the inspector will be there, and whether the report includes severity grading and a status column. Our full property snagging cost guide covers how those answers map to the price bands above. Want the scope written out before you decide? get a fixed quote What Should Be Included in the Price? A properly scoped inspection includes the site visit, the testing, and a written report you can actually submit to a developer. At minimum, expect all of the following in the quoted fee: On-site inspection by a qualified engineer or inspector, named in the report Thermal imaging and moisture testing where relevant Electrical testing including socket polarity, earth continuity and RCD function Level and tolerance checks on floors and walls A numbered defect schedule with severity grading and required actions An indexed photographic appendix cross-referenced to each item Delivery within 24 to 48 hours Commonly excluded Re-inspection visits, express turnaround, travel outside Dubai, and VAT are worth asking about before you book. Any of those can move a quote by several hundred dirhams after you’ve agreed it. Do You Need One Inspection or Two? Most owners need two, and budgeting for one is the most common costing mistake we see. The first is at handover, while the developer’s obligation is at its strongest. The second sits around month nine or ten of the defects liability period, before the one-year window closes. That second visit exists because a property has to live through a Dubai summer and a wet season before its real defects surface. Condensate drains back up under August load. Waterproofing shows itself in February. Neither is visible on handover day, no matter how thorough the first inspection was. Priced together, the pair usually costs less than two standalone
How to Read a Snagging Report (With Sample Entry)

How to Read a Snagging Report (With Sample Entry) Updated 8 October 2026Guide7 min read A snagging report lands in your inbox as a 40-page PDF with 180 numbered items, and the first reaction is usually the same. You scroll, you see a lot of red, and you have no idea which three items actually matter. That’s a shame, because the report is the only leverage you get. Send it to your developer well written and specific, and things get fixed. Send it as an unread attachment and it sits in a queue. In this guide What a report should contain Reading it section by section A single defect entry What the severity ratings mean Which defects to push hardest on Getting the developer to act What a weak report looks like FAQs Conclusion So here’s how to read a snagging report properly: what each section is for, what a single defect entry should contain, what the severity ratings really mean, and how to spot a weak report before you’ve paid for one. What Should a Snagging Report Contain? A complete report has six parts: property and inspection details, a summary of findings, the methodology and equipment used, a numbered defect schedule, a photographic appendix, and a re-inspection or status section. If any of those are missing, you’re holding a checklist rather than a report. The defect schedule is the working document. Everything else supports it. A professional snagging report should let a contractor walk to a specific defect, understand what’s wrong, and know what fixing it involves without phoning anyone. How to Read a Snagging Report, Section by Section Read it out of order. Start with the summary, jump to the severity-rated items, then work through the full schedule room by room. Property detailsCheck the unit number, community, inspection date and weather conditions. Wrong details on the cover page undermine everything after it. Summary of findingsTotal defect count, the split by severity, and the inspector’s overall view. This is what you quote in your first email to the developer. Methodology and equipmentWhat was tested and with what. Thermal imaging, moisture meter, socket tester, laser level, tapping rod. No equipment list usually means a visual walk only. Defect scheduleThe numbered list, organised by room or by trade. This is the bulk of the document and the part contractors work from. Photographic appendixEach defect should reference specific photo numbers, and each photo should show both a close-up and enough context to locate it. Status columnOpen, closed, or rejected. This is what turns a one-off report into a tracking document across the rectification period. What Does a Single Defect Entry Look Like? Every defect should be its own record with a reference, a location, a trade, a description, a severity, photo evidence and a required action. Here’s a real example from an apartment report, anonymised: Sample defect entryMajor Ref B2-014 Location Bedroom 2, east elevation, window reveal Trade Windows and doors Defect Perimeter mastic to window frame incomplete at left jamb over approximately 340mm. Weep holes to bottom track obstructed with mortar residue. Severity Major Evidence Photographs 47, 48, 49 Reference Manufacturer’s installation detail. Drainage path to remain unobstructed. Action required Rake out and reseal full perimeter, clear weep holes, retest under water Status Open, awaiting developer response Look at what that entry does. It gives a location precise enough to find in seconds, a measurement rather than an adjective, a named cause, and an action a contractor can price. Compare it to what a weak report says about the same window: paintwork and sealant need attention. Want a report written to this standard? book an inspection What Do the Severity Ratings Mean? Severity tells you what happens if the defect is ignored, not how ugly it looks. Most reports use three levels. Critical: a safety or compliance issue, or a defect actively causing damage. Loose balustrades, exposed conductors, active leaks. These get raised immediately, not on the normal list. Major: a defect that will worsen, cost significantly more later, or affect how the property performs. Failed waterproofing, wrong floor falls, condensate drains without fall, hollow tiles. Minor: cosmetic or finishing items that don’t get worse. Paint marks, small chips, misaligned cupboard doors, silicone tidiness. The distinction matters because developers rectify in order of effort, not order of importance. If your list doesn’t separate a hairline paint mark from a shower floor draining the wrong way, both get treated as touch-ups. One caveat on severity It’s a judgement rather than a fixed standard, so a good report explains why an item was graded the way it was. An entry marked major with no reasoning behind it is nearly as unhelpful as one with no grade at all. Which Defects Should You Push Hardest On? Push hardest on anything hidden, anything involving water, and anything that gets worse with time. Those three categories are where the money is. Hidden means above ceilings, inside voids and under floors. Once the property is furnished and lived in, nobody reopens a ceiling void for a drain that only leaks in August. Water means waterproofing, falls, seals and drainage, all of which fail slowly and expensively. Getting worse means anything structural, anything moving, and anything already cracking. Cosmetic items are worth listing and worth chasing, but never at the expense of the ones above. A full property snagging inspection should make that hierarchy obvious on the page rather than leaving you to work it out. How Do You Turn the Report Into Something the Developer Acts On? Send it whole, but lead with the items that matter and attach a date. A covering email that opens with four reference numbers and a requested rectification schedule gets a different response to one that says please see attached. Then track it yourself. Keep your own copy of the defect schedule with a status column you update, because the developer’s system and your report won’t stay in sync. When a contractor attends and closes four items, mark those four
RERA Snagging Complaint Process Dubai: How to File

RERA Snagging Complaint Process Dubai: How to File Updated 8 October 2026Guide7 min read There’s a point in most defect disputes where the emails stop being answered. You submitted your snag list, someone acknowledged it, a contractor came once and did half the work, and now nobody replies. That’s the moment owners start asking whether RERA can step in. The short answer is yes, but not in the way most people imagine, and the order you do things matters enormously. In this guide What the process is When to escalate Documents you need What to write How to file on Dubai REST What happens after you file What RERA can actually do If it doesn’t resolve FAQs Conclusion This walks through the RERA snagging complaint process Dubai owners actually use: when to escalate, what evidence carries weight, how to file through Dubai REST, and what the regulator can realistically make a developer do. What Is the RERA Snagging Complaint Process Dubai Owners Follow? The process starts with the developer, not the regulator. You document the defects, submit them through the developer’s own handover channel, allow a reasonable rectification window, and only then file a Real Estate Violation System complaint with the Dubai Land Department if the developer stops engaging. RERA is the regulatory arm of the DLD. It licenses developers, oversees registered projects and enforces conduct rules across the sector. It is not a repair service, and that distinction shapes everything about how you should frame a complaint. When Should You Escalate a Snag to RERA? Escalate once the developer has gone silent after a formal submission, has rejected documented defects without giving a reason, or has let its own agreed rectification window run out. One unanswered email isn’t grounds for a complaint. Three weeks of silence following a logged snag list is. Mind the six-month limit RVS complaints have to be filed within six months of the issue arising, so a defect you’ve been chasing politely for a year sits in a far weaker position than one escalated at week six. Before you file, exhaust the direct route properly. A firm, dated, evidence-backed email to the head of customer care resolves more cases than a regulator ever will, and our guide to negotiating developer defects sets out the wording and the sequence that tends to work. What Documents Do You Need to File a RERA Complaint? You need proof of ownership, proof of the defect, and proof that you tried to resolve it directly. Gather these before you open the app, because a half-documented complaint stalls at the first review: Emirates ID or passport copy Your sale and purchase agreement Oqood registration certificate if the unit was bought off-plan Proof of payments made to the developer Every email, letter and message exchanged about the defects, with dates Dated photographs or video of each defect Your independent snagging or inspection report Files upload as JPG, PNG or PDF. The inspection report is the one that changes the tone of the whole file. A reviewer reading that a bathroom floor feels uneven treats it as an opinion. A reviewer reading a measured deviation against a named tolerance treats it as evidence. Need a report that stands up in a complaint file? book an inspection What Should You Write in the Complaint Description? Write a timeline, not a complaint. You have roughly 1,000 characters, and the files that move fastest spend them on dates rather than adjectives. A description that works reads something like this: the unit was handed over on a stated date, an independent inspection on a stated date recorded a specific number of defects, the list was submitted through the developer’s portal with a reference number, the developer acknowledged it and attended once, a specific number of items remain outstanding, and there has been no response since a stated date. No frustration, no adjectives, no history of how the purchase went. Reviewers process a high volume of these files, and the ones that get traction read like a record rather than a grievance. How Do You File a RERA Complaint Through the Dubai REST App? Filing is free and takes under fifteen minutes if your documents are ready. The same service is available on the DLD website at dubailand.gov.ae. Open Dubai RESTGo to Services, then Register a Real Estate Complaint. Choose the complaint typeSelect Real Estate Violation Complaint and accept the terms before continuing. Enter your detailsName, mobile, email and Emirates ID, plus your claimant type as the owner. Enter the developer’s detailsSearch for the company by name or licence number and pick the correct complaint category. Add the project and unitIdentify the building, cluster and unit number the defects relate to. Describe the issueYou have roughly 1,000 characters. Stick to dates, facts and what was submitted when. Attach your evidence here. Verify and submitConfirm with the OTP sent to your phone. Save the complaint number, because everything afterwards runs off it. What Happens After You File, and How Long Does It Take? Expect contact by call or SMS within about five business days, and a target resolution window of 60 days from the filing date. The file goes to a sector coordinator, RERA checks it’s complete and within its jurisdiction, then approaches both sides. Complex cases run past 60 days, particularly where more evidence gets requested. You can check progress at any point using the RVS complaint tracking service on the app or the DLD website with your complaint number. The DLD call centre is on 800 4488 inside Dubai. Outcomes range from a compliance instruction to the developer, through to fines, licence action and in serious cases intervention in the project itself. What Can RERA Actually Do About Snagging Defects? RERA can apply regulatory pressure and it can mediate. What it generally won’t do is issue you a repair order the way a court can, because RVS is a violations channel rather than a defects tribunal. Contract cancellations and refund claims fall outside it entirely. In
DLP Deadline Dubai: When Does It Expire?

DLP Deadline Dubai: When Does It Expire? Updated 8 October 2026Guide6 min read Most owners find out about their defects liability deadline roughly three weeks after it’s passed. A leak appears in month thirteen, they email the developer, and the reply says the cover ended in March. While that one-year window is open it’s genuinely valuable. Rectification is free, the fit-out contractors are still reachable, and there’s a process to escalate through. Once it closes, the same repair comes out of your own pocket. In this guide What the DLP covers Your unit vs common areas When the clock starts How to confirm your date Why not wait until month eleven What happens once it expires FAQs Conclusion So the DLP deadline Dubai owners work to is worth knowing precisely rather than roughly. This covers when the clock actually starts, why it’s probably not the day you collected your keys, how to confirm your own date, and what still protects you afterwards. What Does the Defects Liability Period Actually Cover? There are two separate layers of protection and buyers routinely confuse them. The first is the one-year period covering general workmanship and MEP systems. Paint, tiling, joinery, doors, plumbing, drainage, electrical work and air conditioning all sit here. This is the layer with the short fuse and the one this article is about. The second is structural liability, which runs for ten years under Article 880 of the UAE Civil Code and covers the contractor and the design consultant. That’s for genuine structural failure or defects threatening the stability of the building, not a cracked skirting board. Our DLP inspection page goes into what each layer includes in practice. What the period doesn’t cover is worth stating just as plainly. Normal wear and tear sits outside it. So does damage caused by your own fit-out contractor, anything you’ve modified yourself, and cosmetic marks that appeared after the furniture went in. Developers reject items on those grounds regularly, which is a strong argument for getting a dated, photographed report on file early rather than describing a problem in an email six months later. Your Unit, the Common Areas, and Who Chases What Owners often assume a single deadline covers everything they can see from their front door. It doesn’t. Defects inside your unit are yours to report directly to the developer. Defects in corridors, lobbies, the car park, the pool deck, lifts and the building envelope belong to the owners association, and the developer’s obligations there are normally handed across alongside the common area assets. The DLP deadline Dubai owners chase for their own apartment isn’t always the same date the association is working to. That matters when the two overlap. If a ceiling stain in your bedroom is actually coming from a riser in a common shaft, you’ll get passed between the developer and the building manager while both clocks run down. Log it twice, on the same day If a defect could belong to either party, report it to both the developer and the building manager, in writing, on the same day. Why Does the DLP Deadline Dubai Clock Start Earlier Than You Think? Here’s the assumption that costs people money. Almost everyone believes the year runs from the day they collected their keys. In most sale and purchase agreements it doesn’t. It runs from the building’s completion date, which is the date on the completion certificate issued to the developer. Picture a tower that gets its completion certificate in September. Your final payment takes a while to clear, so you collect keys in December. You assume you’re covered until the following December. Depending on how your agreement is worded, you may already be three months into the period, with nine months left rather than twelve. This is exactly why we push owners to read the clause rather than trust the assumption. The wording varies between developers and even between projects from the same developer. How to Confirm Your Own Expiry Date Five steps, and none of them take long: Read the clauseOpen your sale and purchase agreement and find the defects liability or warranty section. It will state what triggers the period. Get the completion date in writingEmail the developer’s customer care or handover team and ask for the building completion certificate date. Keep the reply. Check your handover packThe unit acceptance documents you signed at key collection sometimes carry the date already. Ask the owners associationFor common area items, community management will hold the relevant dates for the building rather than your unit. Diarise it properlyPut the expiry in your calendar with reminders at 90 days and 30 days out. That single step prevents most of the problems we see. Not sure how much time you have left? book a dlp inspection Why Not Wait Until Month Eleven? The advice we give every client is to inspect at month nine or ten, not month twelve. There are two reasons for it. First, submitting on the last day doesn’t help you if the developer takes six weeks to schedule a contractor. You want your list logged and acknowledged with real time left on the clock. Second, a property has to live through a full Dubai summer and one wet season before its true defects surface. AC systems reveal themselves under August load. Waterproofing reveals itself in February. A month-nine inspection catches things that a handover-day walkthrough physically cannot. The findings that only appear this late tend to be the same ones every year: Ceiling stains where a condensate drain backs up under heavy summer load Hairline cracks at wall and column junctions that opened as the structure settled Silicone at baths, worktops and shower trays that has shrunk and split Grout failing around floor drains and in shower trays Balcony and terrace drainage that only shows itself after real rain Door frames that moved once the unit was occupied and running AC daily DLP Deadline Dubai: What Happens Once It Expires? For general defects inside your unit,
Emaar Handover Checklist 2026: Inspector’s Guide

Emaar Handover Checklist 2026: Inspector’s Guide Updated 8 October 2026Checklist7 min read Getting the completion email from Emaar is a good day. Then the appointment slot lands, and you’ve suddenly got a week to work out what you’re actually meant to be looking at. I’ve walked hundreds of Emaar units at handover, from one-beds in Creek Rise to six-bedroom villas in Golf Place. The pattern rarely changes. Buyers arrive excited, spend forty minutes opening cupboards, sign the acceptance paperwork, and only find the hollow floor tiles and the second bedroom that never cools down properly three weeks later. In this guide How the handover process runs Clear the utilities first Room-by-room checklist Villas: the outside matters Defects we keep finding Snags, the DLP clock and pushback FAQs Conclusion This Emaar handover checklist 2026 is the one I’d hand a friend. It covers the paperwork you clear first, the order to do things in, and the faults that actually show up in Emaar stock. It’s the same order we work in at Dubshy, whether it’s a studio in Downtown or a villa in The Valley. How Does the Emaar Handover Process Run in 2026? Emaar is better organised than most developers here, and that cuts both ways. The process moves fast, so if you’re not ready you’ll sign for a unit you haven’t properly looked at. Completion noticeEmaar emails you once the building has its completion certificate, usually several weeks before your slot window opens. Final paymentThe last instalment and related transfer or admin charges must clear before a slot is released. Service chargesCommunity management usually asks for a few months of service charges up front, billed through Mollak. Slot bookingSlots open in blocks and the good ones go fast, especially at month end. Book early, then book your inspector for the same week. Key collectionYou sign the unit acceptance documents at the handover centre and collect keys, access cards and parking permits. InspectionAn independent snagging report goes in here, ideally within days of getting the keys. Snags and rectificationYour list goes to the handover team or through the Emaar One app, contractors return, then you re-check. Worth saying plainly Signing at key collection doesn’t sign away your defect rights. It just starts the part of the timeline you control. Clear the Utilities Before Anyone Inspects Anything You can’t inspect a property with no power and no water. Half the report depends on both. Get DEWA activated in your name first (you’ll need your handover documents, the premise number and a refundable deposit), and open the district cooling account, which is Empower or Emicool depending on the community. Then run the AC for at least two hours before your inspector arrives. Cold air at a vent after ten minutes proves nothing. The temperature split after a proper run tells you whether the FCU is performing or just moving air around. Your Emaar Handover Checklist 2026, Room by Room Doors, windows and balcony thresholds Every door gets opened, closed and latched. Check the strike plates line up, the hinges don’t bind, and no door drifts shut on its own, because that’s a frame out of plumb rather than a draught. On sliding balcony doors, check the rollers, the gaskets and the weep holes in the bottom track. Blocked weep holes are why water sits against a threshold in February and creeps under the flooring. Bathrooms and kitchen Fill each basin and bath, then release. Watch how fast it drains and check underneath for movement at the waste connection. In showers, pour water across the floor and see where it goes. If it sits anywhere away from the drain, the fall is wrong, and that’s a screed problem, not a silicone problem. In kitchens, open every door and drawer and check the alignment, look at the seal where the worktop meets the splashback, and confirm the extractor is ducted outside rather than blowing into a ceiling void. That last one is more common than you’d hope. AC, electrics and the bits behind the ceiling This is where the money is. Check the temperature split at each FCU, look at the condensate drain in the ceiling void for slope and insulation, and confirm each thermostat controls the room it’s labelled for. Swapped bedroom thermostats turn up constantly in apartment stock. Test every socket for polarity and earth, trip and reset the RCD, check the board labelling, and look at whether the downlights match in colour temperature. That sounds cosmetic until you’re in a living room where half the ceiling reads warm and half reads cold. Floors, walls and ceilings Tap across the tiled floors. A hollow sound means the tile bed didn’t take, and that tile will crack or lift later. Check lippage between tiles, gaps at the skirting, and grout that’s already shrunk back. For paint and plaster, use raking light. Hold a torch flat against the surface and every roller mark, patch repair and dent shows itself. Same again on ceilings, especially around bulkheads and access hatches. Rather have an engineer run the whole list? book an inspection Villas: Where the Outside Matters More Than the Inside On villa handovers in Arabian Ranches III, The Valley and Emaar South, most of the value in a report comes from outdoors. Roof waterproofing and upstand detail, boundary walls, external paint, driveway falls, garden drainage, the water tank and pump area, and the gate motor. Interior villa snags are usually cosmetic. The external ones cost real money to put right later. Which Defects Do We Keep Finding in Emaar Units? Nothing on this Emaar handover checklist 2026 is theoretical. Emaar sits at the better end of the market for build quality, and that’s worth saying honestly, but quality control at this scale is hard. The recurring patterns are consistent enough that I could nearly call them by community: Hollow and lipped floor tiles, usually near thresholds and along corridors Blocked or missing weep holes on sliding doors and windows Condensate drains with too little